Who Was Ruth Stout? Her No-Work Garden Method Explained for Beginners
Last updated March 13, 2026
Quick Snapshot: Everything You Need to Know
- Who she was: Ruth Stout (1884–1980), Connecticut homesteader, nicknamed "the Mulch Queen"
- The method in her own words: "I never plow or spade or cultivate or weed or hoe or use a fertilizer or use a poison spray or use a compost pile, or water."
- What you do: Cover your garden with 8 inches of hay or organic mulch and leave it there permanently. Add more material on top year-round. Never till.
- Best for: Potatoes, onions, garlic, squash, tomato transplants, pepper transplants, perennial herbs
- Tricky for: Direct-seeded crops like carrots, lettuce, and radishes — sow in bare soil, mulch after sprouting
- What you need to start: Spoiled/old hay or straw, seeds or transplants, patience for the first season
- Honest note: The garden will look like a pile of hay. That's not a problem — that's the method.
Who Was Ruth Stout?
If you've spent any time on homesteading TikTok or stumbled across the New Yorker lately, you've probably heard the name Ruth Stout. She's everywhere right now — millions of posts, tribute videos, passionate fans who credit her with finally making gardening feel possible. And she's been dead since 1980.
Ruth Stout was born in 1884 in Girard, Kansas, the fifth of nine kids in a Quaker family. Her younger brother Rex Stout went on to write the famous Nero Wolfe mystery novels. Ruth spent decades being introduced as "Rex Stout's sister" — which she absolutely could not stand. "I don't want to be remembered as Rex Stout's sister," she said. "I want him to be remembered as Ruth Stout's brother." She got her wish, eventually.
Her early life had nothing to do with gardening. She was a political radical — Socialist, Communist, Greenwich Village tearoom owner, and reportedly attended Lenin's funeral in Moscow in 1924. At age 44, she married Fred Rossiter and they moved to a 55-acre farm in Redding Ridge, Connecticut, which they called Poverty Hollow. She spent the next several decades growing almost everything she and her husband ate — and doing it with increasingly less work. The mulch method, as she tells it, came about almost by accident: the man who was supposed to plow her garden one spring didn't show up, and she decided she'd just cover the ground with hay and figure it out. She never looked back.
She published her first gardening book at age 71. She gardened until she was very old. She also famously gardened naked, which she found comfortable and the neighbors found reason to keep their distance. She was, by all accounts, exactly the kind of person you'd want to spend an afternoon with.
What Is the Ruth Stout Method?
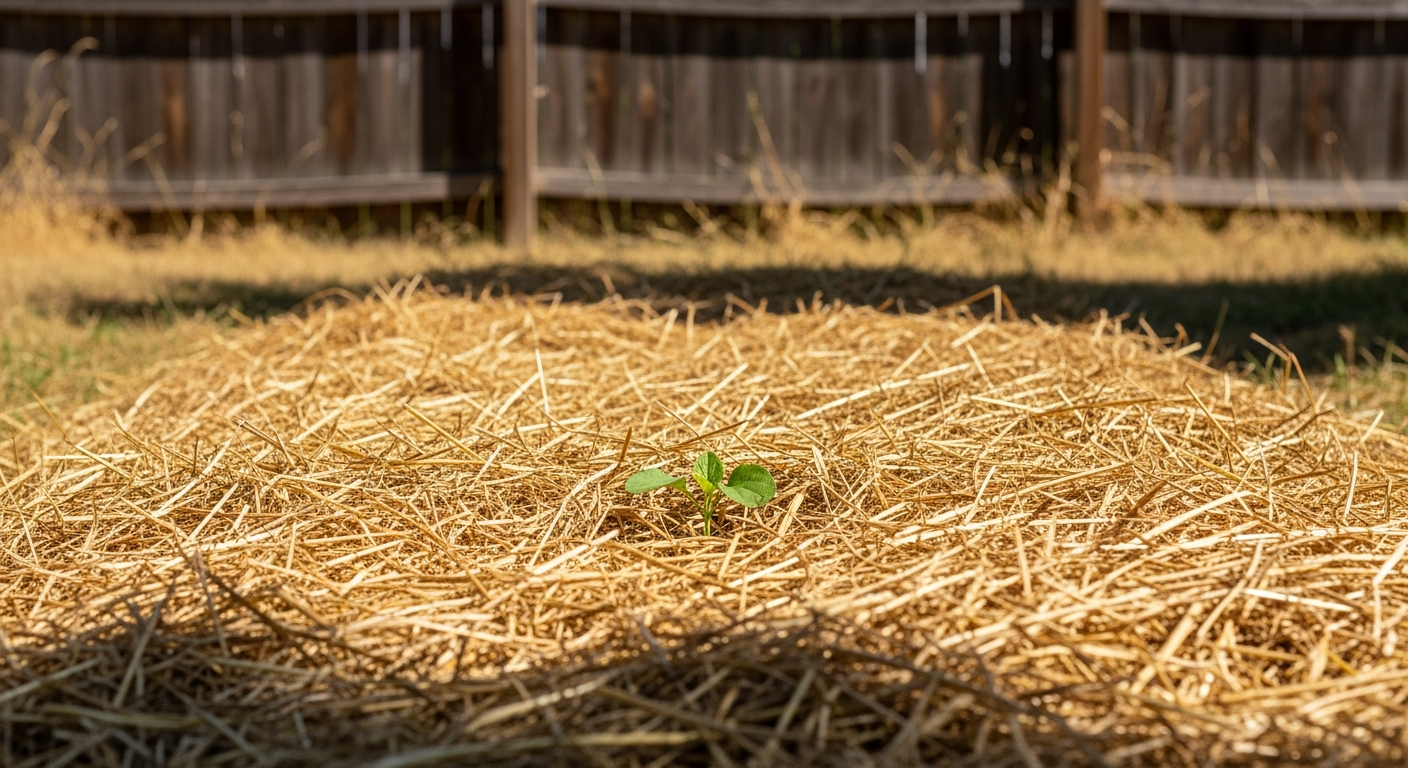
The Ruth Stout method — also called "deep mulch gardening" or "no-work gardening" — is exactly what she claimed it was: you stop digging up your garden, cover it with a thick permanent layer of hay or organic mulch, and let the soil do its own work from there. No tilling, no fertilizer, no compost piles, no watering.
"I never plow or spade or cultivate or weed or hoe or use a fertilizer or use a poison spray or use a compost pile, or water." — Ruth Stout
Here's how it works in practice:
- Start with whatever ground you have — even existing lawn, even clay soil, even ground you've never gardened before. You don't need to prep it first.
- Cover it with 8 inches of hay or straw. Don't skimp. Ruth was emphatic about this. More is better, especially in year one.
- Year-round, pile on everything organic. Kitchen scraps, fallen leaves, pulled weeds, cardboard, old newspapers, grass clippings — anything that used to be living goes on top of the mulch. This is your composting. No pile required.
- When planting time comes, push the hay aside. Tuck seeds or transplants into the soil underneath, then pull the mulch back around (not over) the plants.
- Keep adding material throughout the season. The mulch breaks down. Add more.
- Harvest when ready. Repeat. By year two, the soil underneath will be noticeably richer and darker than when you started.
The key thing to accept: the garden will look like a pile of hay. Neighbors may comment. Ruth Stout absolutely did not care, and neither should you.
What Can You Use as Mulch?
Ruth Stout used old hay because that's what she had available from her farm. But the method works with nearly any organic material — and this is where a lot of people get stuck ("I don't have hay, can I still do this?"). Yes. Here's what works:
| Material | Works? | Notes |
|---|---|---|
| Old/spoiled hay | ✅ Best | Ruth's original choice; breaks down fast, feeds the soil |
| Straw | ✅ Great | Slower to break down than hay; widely available as bales |
| Dry leaves | ✅ Great | Shred if you can — whole leaves sometimes mat |
| Grass clippings (dried) | ✅ Yes | Dry them first before adding a thick layer |
| Cardboard | ✅ Yes | Excellent as a base layer under hay; kills grass and weeds |
| Kitchen scraps | ✅ Yes | Bury under the mulch layer; no compost pile needed |
| Newspaper | ✅ Yes | Works as a weed barrier under hay |
| Wood chips | ⚠️ Caution | Better for paths than planting beds |
| Dyed/treated mulch | ❌ No | Chemicals; skip it |
On grass clippings specifically (since this comes up a lot): yes, you can use them, but dry them out first. Fresh green clippings piled on thick will mat together, block airflow, and start to smell bad. Spread them thinly and let them dry, or mix them in with hay or straw to prevent clumping.
How to Get Hay Cheaply or Free
Ruth Stout got her hay from a neighboring farmer. You can do the same thing, even if you're not on a farm:
- Call local farms and ask if they have spoiled or old hay — wet or moldy hay that can't be sold as feed is often free for pickup
- Check Craigslist or Facebook Marketplace — search "spoiled hay," "old hay," or just "hay"
- Ask anyone with horses — horse owners frequently have old hay they'd be glad to get rid of
- Offer to haul it yourself — that trade alone often gets you as much as you need
The first year you'll use more hay than you expect. After that, fallen leaves, kitchen scraps, and whatever organic material accumulates on your property keeps the layer going.
What Can You Grow With the Ruth Stout Method? (The Honest Answer)
The Ruth Stout method is remarkable, but it's not a magic override for how plants grow. Here's what actually works.
Plants That Thrive
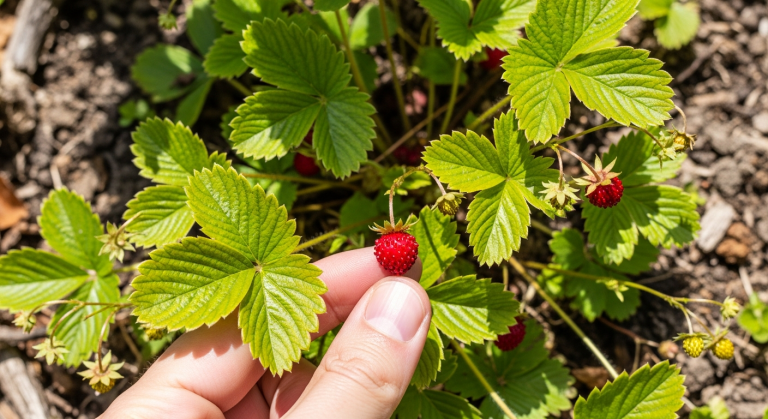
Potatoes are the classic Ruth Stout success story, and for good reason — push the mulch aside, set your seed potato in the soil, cover it back up, and wait. Potatoes grow so well under hay mulch that some people never see them — you just plunge your hand in at harvest time and pull them out. If you try nothing else with this method this year, try potatoes.
Onion sets work just as easily as potatoes. Set them in the soil, cover with hay, let them do their thing. I've heard from people who grew through entire droughts this way and still got a decent harvest.
Garlic, squash, pumpkins, zucchini, tomato transplants, and pepper transplants all do well. Perennial herbs — mint, oregano, thyme — thrive when you mulch around established plants.
What Needs Some Adjustment
This is where a lot of first-year Ruth Stout gardeners run into trouble: direct-seeded crops don't love the method straight out of the box.
Carrots, radishes, beets, lettuce, and other crops you sow directly from seed need to make contact with the soil to germinate. A thick layer of hay sitting on top prevents that. The fix is simple: pull the mulch away from a small area, sow your seeds directly in the soil, and wait. Once the seedlings are a few inches tall and established, pull the mulch back around them. Same approach works for corn.
The Real Limitations (Don't Skip This)
Slugs. The moist, cool environment under hay mulch is paradise for slugs. If you already have serious slug pressure in your garden, the Ruth Stout method will make it worse. This is worth thinking about before you commit.
First-year setup is real work. Ruth Stout called her method "no-work," and she wasn't wrong about the long-term — but spreading 8 inches of mulch across a full planting area the first time takes genuine physical effort. The "no-work" promise kicks in fully from year two onward, when you're just adding to an existing layer rather than building it from scratch.
It looks messy. The garden will look like a pile of hay. This is correct. Some people love the look; others spend the whole season apologizing to their neighbors. Ruth Stout would tell you this is the neighbors' problem, not yours.
How to Start a Ruth Stout Garden This Season
The best time to start is now — whether that's fall (build your mulch layer before winter, plant in spring) or spring (start planting right away). Here's exactly what to do:
- Pick your spot. Anywhere — even existing lawn, even heavy clay, even ground that's never grown anything. That's the point of this method.
- Source your hay or straw using the ideas above. Aim for spoiled/old hay if you can find it.
- Optional but helpful: lay cardboard first. Wet it down thoroughly, overlap the seams, and it will smother grass and weeds under the mulch.
- Dump on 8 inches of hay. This is more than you think. Go thick. First-year setup is when you need the most material.
- Wait 2–4 weeks if you're covering existing lawn — the grass underneath will start dying back.
- When ready to plant, push the hay aside. Place transplants or seeds in the soil below, then pull hay back around the plants, leaving a little breathing room around each stem.
- Keep adding organic material all season. Kitchen scraps go under the hay. More hay on top as it breaks down. Fallen leaves in fall. Everything goes in.
- By next spring, notice the difference. The soil underneath will be darker, richer, and full of earthworm activity in a way it probably wasn't before.
If it's fall where you are right now, this is actually a great time to start — build your mulch layer this season and let it break down all winter. You'll have a head start come spring planting.
Ruth Stout's Books (If You Want More of Her)
All three of her major gardening books have been reissued in recent years and are easy to find:
- "How to Have a Green Thumb Without an Aching Back" (1955) — her first and best-known. Start here.
- "Gardening Without Work" (1961) — her philosophy expanded; some people say this one is even better.
- "The Ruth Stout No-Work Garden Book" (1971) — co-authored with Richard Clemence; more practical and hands-on.
I started with "Green Thumb Without an Aching Back" and honestly, the writing alone is worth it. Ruth Stout had serious personality — she's funny and confident and opinionated, and she writes the way she seems to have lived. You'll like her.
Frequently Asked Questions
What is the Ruth Stout method?
The Ruth Stout method is a form of no-till, deep mulch gardening. You cover your garden with a permanent 8-inch layer of hay or organic mulch, leaving it in place year-round. You add organic material on top continuously — kitchen scraps, leaves, cardboard, grass clippings. When it's time to plant, you push the mulch aside, plant seeds or transplants in the soil below, and pull mulch back around the plants. After the first year of setup, ongoing maintenance is minimal. The soil improves significantly over time.
What are the disadvantages of the Ruth Stout method?
The main disadvantages: (1) Slugs love the moist, cool mulch environment — if you have heavy slug pressure, this method amplifies it. (2) Direct-seeded crops like carrots, lettuce, and radishes don't germinate reliably under thick mulch — sow in bare soil, pull mulch back, mulch again after sprouting. (3) The first year involves real physical work spreading 8 inches of mulch; the "no-work" claim fully applies from year two. (4) The garden will look like a hay pile, which some gardeners (and their neighbors) find difficult to accept.
Can you use grass clippings for the Ruth Stout method?
Yes — dry them first. Fresh green grass clippings piled on thick will mat together and can smell unpleasant as they break down. Let them dry in the sun, spread them thinly, or mix them in with hay or straw so they don't clump. Dried clippings are a solid free mulch material.
What grows best with the Ruth Stout method?
Potatoes are the standout success story — many people try Ruth Stout specifically for potatoes and never go back to conventional planting. Onions, garlic, squash, pumpkins, tomato transplants, pepper transplants, and perennial herbs all do very well. If you want to start with one thing, make it potatoes.
Is Ruth Stout no-till the same as lasagna gardening?
They're related — both use layered organic material without tilling. Lasagna gardening typically involves deliberate alternating layers of different materials (like building a compost pile in place) and is often used to quickly establish a new bed. Ruth Stout's approach is simpler: pile on whatever organic material you have, as thick as possible, and keep adding. Ruth herself would probably have found lasagna gardening unnecessarily complicated.
How much hay do you need to start?
More than you think. Plan for a full 8 inches of depth across your entire planting area. For a standard 4×8-foot bed, that's roughly 2–3 bales of straw or a solid truck bed of old hay. Don't skimp in year one — the mulch will compress and break down over the season, and starting thick means you won't have to add as much mid-season. By year two, your existing material plus what you add throughout the season is usually enough to maintain the layer.