Cocoa Butter Soap Recipe: Easy Melt-and-Pour + Cold Process Guide
Last updated March 13, 2026
Quick Snapshot
- Two methods covered: melt-and-pour (no lye, 30 minutes, ready in hours) and cold process (lye, 60–90 minutes, 4–6 week cure)
- What cocoa butter adds: firmer bars, longer shelf life, a creamy conditioning lather — and a subtle chocolate scent if you use raw cocoa butter
- Melt-and-pour: no special equipment, no lye, no curing — you can gift these bars this weekend
- Cold process: 4–6 week cure, fully customizable, makes what soap makers call "real" soap
- First time making soap? Start with melt-and-pour. You'll have bars today and be ready for cold process next.
What Does Cocoa Butter Do in Soap?
Cocoa butter pulls its weight in soap in a few specific ways. It's high in stearic and palmitic fatty acids — the same ones that give it that dense, waxy texture at room temperature — and those acids translate directly into harder, longer-lasting bars. If you've ever gone through a soft homemade soap in two weeks, adding cocoa butter is your fix.
It also changes the feel of the lather. Cocoa butter doesn't produce big, fluffy bubbles the way coconut oil does. What it gives you instead is a creamy, conditioning lather that leaves your skin feeling soft rather than stripped. For the best of both worlds — rich bubbles and a conditioning feel — pair cocoa butter with coconut oil. That's exactly what the cold process recipe below does.
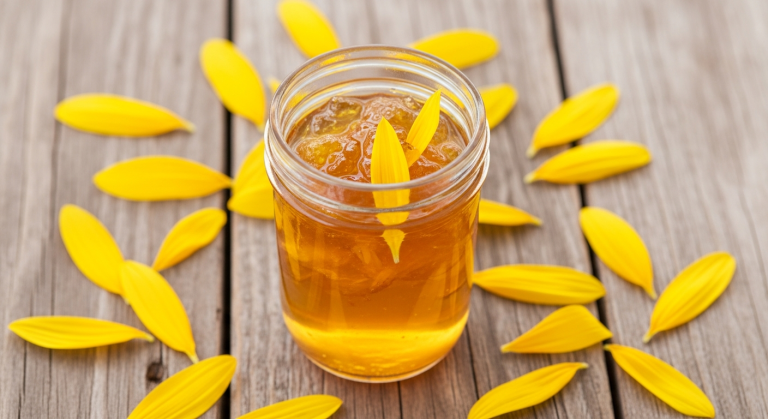
One more thing worth knowing: raw, unrefined cocoa butter retains a mild chocolate scent even after saponification. It's subtle, but it's there. Deodorized cocoa butter has no scent at all and works just as well. Either one is fine for soapmaking — just make sure you're buying cosmetic-grade or food-grade cocoa butter, not processed confectionery coating, which is a different product entirely.
As for how much to use: in cold process, stick to 10–25% of your total oils. Above 30%, bars can get so hard they crack. The recipe below uses 12 oz out of 44 oz total oils — right in the sweet spot.
Which Method Is Right for You?
Here's the honest answer: if you've never made soap before, start with melt-and-pour. You'll get a feel for pouring, scenting, and molding without any chemistry involved. Once you've done that a couple of times, cold process will feel a lot less intimidating.
| Melt-and-Pour | Cold Process | |
|---|---|---|
| Skill level | Beginner | Intermediate |
| Lye required? | No | Yes |
| Active prep time | 30 minutes | 60–90 minutes |
| Ready to use | 2–4 hours | 4–6 weeks |
| Customizable | Moderately | Highly |
If this is your first time making soap, start with melt-and-pour. You'll get the feel for molding, scenting, and setting without the chemistry. If you've already tried M&P and want to go deeper, cold process is your next step.
Method 1: Easy Cocoa Butter Melt-and-Pour Soap
No lye, no curing, no specialized equipment. You can make a batch of these on a Saturday morning and have them ready to wrap and give by that afternoon. That's the beauty of melt-and-pour — it takes all the chemistry out of the equation and lets you focus on the fun parts: scenting, coloring, and molding.
Ingredients and Equipment
Ingredients (makes 8–10 bars):
- 2 lbs cocoa butter melt-and-pour soap base
- 1 tablespoon raw cocoa butter (optional — for extra richness)
- 1–2 teaspoons essential oil (lavender, orange, and vanilla are easiest for beginners)
- Optional: dried lavender, rose petals, or mica colorant
Equipment:
- Large microwave-safe glass measuring cup (or double boiler)
- Silicone soap mold — loaf or individual bar molds
- Kitchen scale
- Silicone spatula
- Rubbing alcohol in a spray bottle
Steps
- Weigh and cut your M&P base into 1-inch cubes. Smaller pieces melt more evenly and reduce the chance of scorching.
- Melt in 30-second microwave bursts, stirring between each interval. Don't rush this — overheating the base dulls the finished bar and can cause sweating.
- Let it cool until the steam stops rising — around 130–140°F. If you don't have a thermometer, just wait until the surface stops steaming. That's close enough.
- Stir in the extra raw cocoa butter (if using) and stir until fully melted. It should incorporate quickly.
- Add your essential oils and stir gently — don't whisk or beat the mixture, or you'll create air bubbles that show up in your finished bars.
- Stir in any botanicals or colorant at this point if you're using them.
- Pour slowly into your molds, filling each cavity in a steady stream.
- Immediately spritz the surface with rubbing alcohol. This pops surface bubbles before they set — skip this step and you'll have a bumpy top.
- Let the bars set for 2–4 hours, then unmold. No curing required — these are ready to use or gift right away.
Gifting Callout
These bars make genuinely beautiful gifts. Wrap them in a square of parchment paper, tie with twine, and tuck a sprig of dried lavender or a small cinnamon stick into the bow — you'll have something that looks like it came from a boutique. I make a batch every October so they're ready in time for holiday giving, and they're always the first thing to go.
Method 2: Cold Process Cocoa Butter Soap (With Lye)
Cold process is the method that produces what most soap makers consider "real" soap — fully customizable, chemical-free in the finished bar, and deeply satisfying to make. It takes more time and a bit more attention than melt-and-pour, but it's genuinely manageable once you understand what you're doing.
A Note About Lye Safety
I know lye sounds scary. It was scary to me the first time too. But here's what I wish someone had told me sooner: the finished soap contains zero lye. None. The saponification process converts it completely — what you end up with is soap and glycerin, the same chemistry that happens in every bar of real soap ever made, including the ones at the store.
That said, lye (sodium hydroxide) is caustic in its raw form, so you do need to handle it carefully. Always wear goggles and gloves. Work in a ventilated space — either near an open window or outside. And always add lye TO water, never the other way around. Adding water to lye can cause a dangerous steam reaction. Use heat-safe containers — no aluminum, which reacts with lye. Follow those four rules and you'll be fine.
Ingredients and Equipment (makes ~10–12 bars)
Ingredients — always measure by weight, not volume:
- 16 oz (454g) olive oil
- 12 oz (340g) cocoa butter
- 12 oz (340g) coconut oil
- 4 oz (113g) castor oil
- 4.95 oz (140g) sodium hydroxide (food-grade lye)
- 12 oz (340g) distilled water
- 1–2 oz essential oil at trace (optional)
Note: If you want to modify this recipe, run any changes through SoapCalc.net or BrambleBerry's lye calculator before you make it. Different oils require different amounts of lye — this is not a place to eyeball it.
Equipment:
- Kitchen scale (required — everything in cold process is measured by weight)
- 2 heat-safe pitchers or large Pyrex measuring cups (one for the lye solution, one for the oils)
- Stick/immersion blender
- Digital thermometer
- Silicone loaf mold + parchment paper to line it
- Goggles and gloves (non-negotiable)
- Silicone spatula
Step-by-Step Cold Process
- Put on your goggles and gloves before you touch anything. Have all your equipment and pre-measured ingredients ready before you start — cold process moves faster than you expect once the lye is mixed.
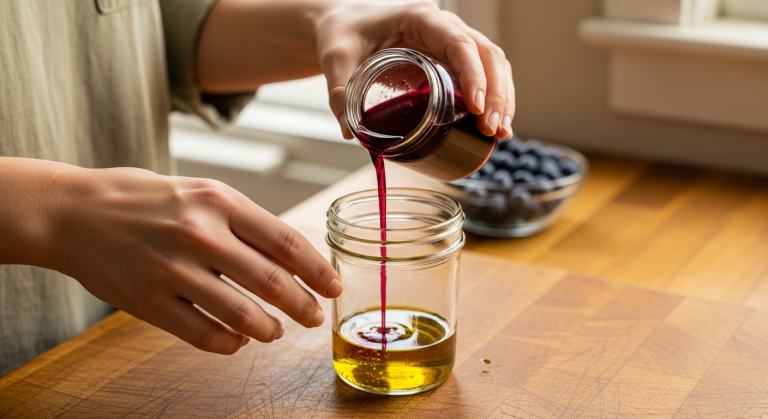
- Weigh the distilled water into a heat-safe pitcher. In a separate container, weigh the lye. Then slowly add the lye to the water while stirring — not the other way around. The solution will heat up rapidly; that's completely normal. Set it aside in a safe spot to cool.
- Melt the coconut oil and cocoa butter together in a large heat-safe bowl or pitcher. Once they're liquid, add the olive oil and castor oil. Stir to combine.
- Check temperatures on both. You want the lye solution and the oils to both be between 100–110°F before you combine them. The oils may need a brief reheat; the lye solution just needs time to cool down.
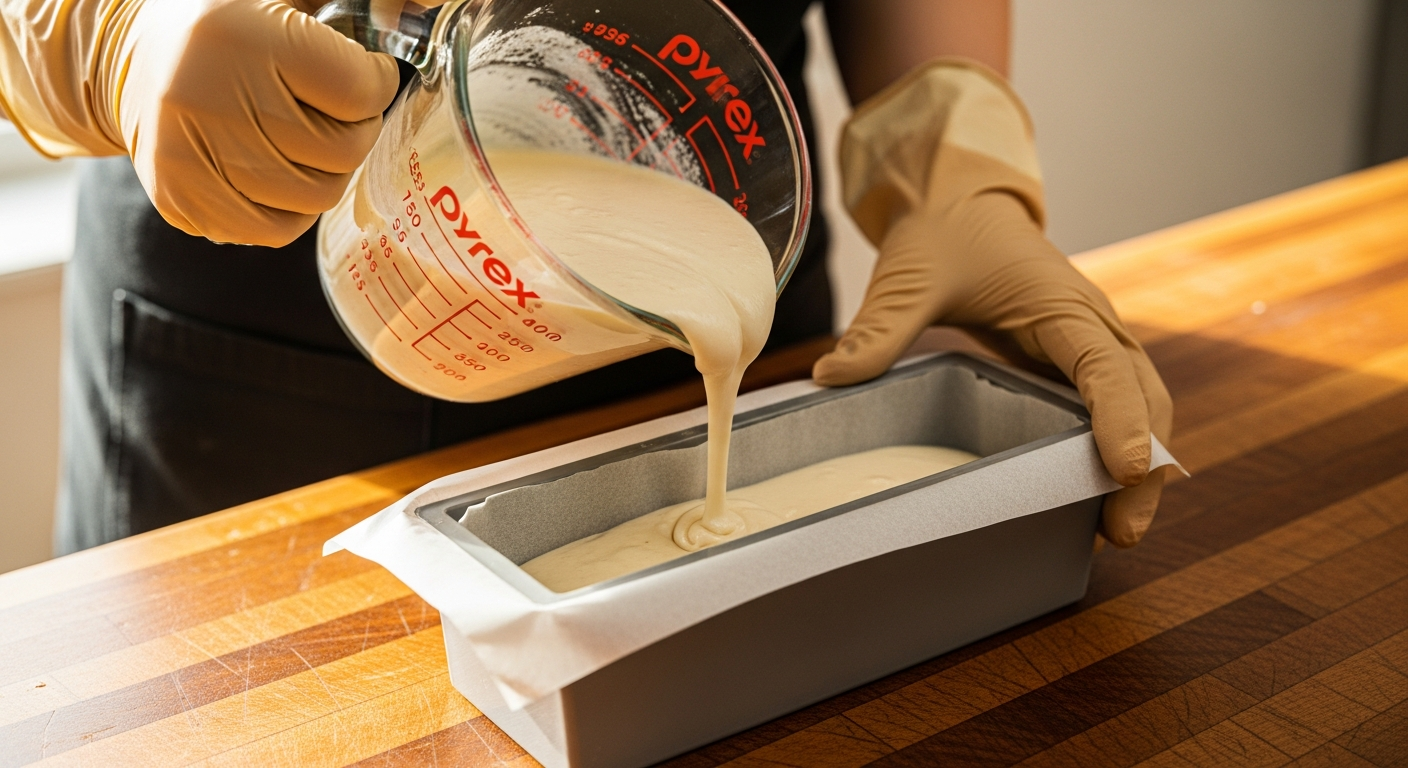
- Slowly pour the lye solution into the oils (not the other way around). Stir briefly with a spatula before reaching for the blender.
- Use the stick blender in short pulses — about 5 seconds on, then stir by hand, then 5 seconds on again. You're looking for "trace," which is when the batter thickens to a light pudding consistency and holds a faint surface trace when you drip some from the blender. Light trace is all you need before adding fragrance.
- Add your essential oils once you reach trace and stir by hand until combined. Don't blend again after adding fragrance — some oils can accelerate trace quickly.
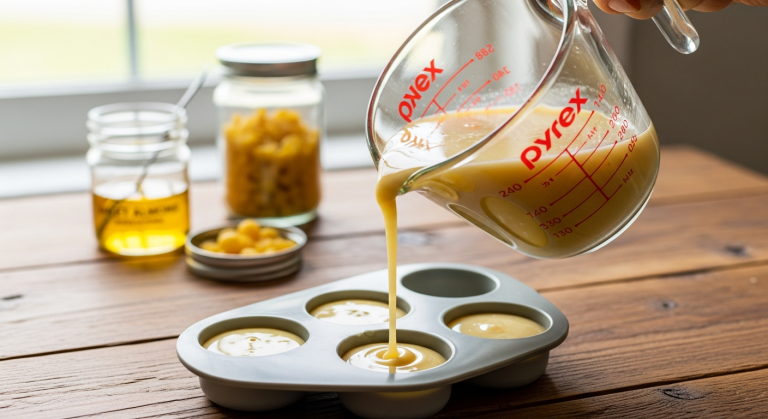
- Pour the batter into your lined mold. Tap the mold gently on the counter a few times to release air bubbles. Cover with a piece of cardboard and wrap with a towel to insulate — this encourages the gel phase, which gives you a more translucent, saturated final bar.
- Leave it completely undisturbed for 24 hours. Then unmold and cut into bars.
- Cure on a rack with good airflow for 4–6 weeks before using. I know the wait is hard — but lye finishes converting during the cure period, and bars that cure fully are noticeably milder and harder. It's worth it.
Scent Combinations to Try
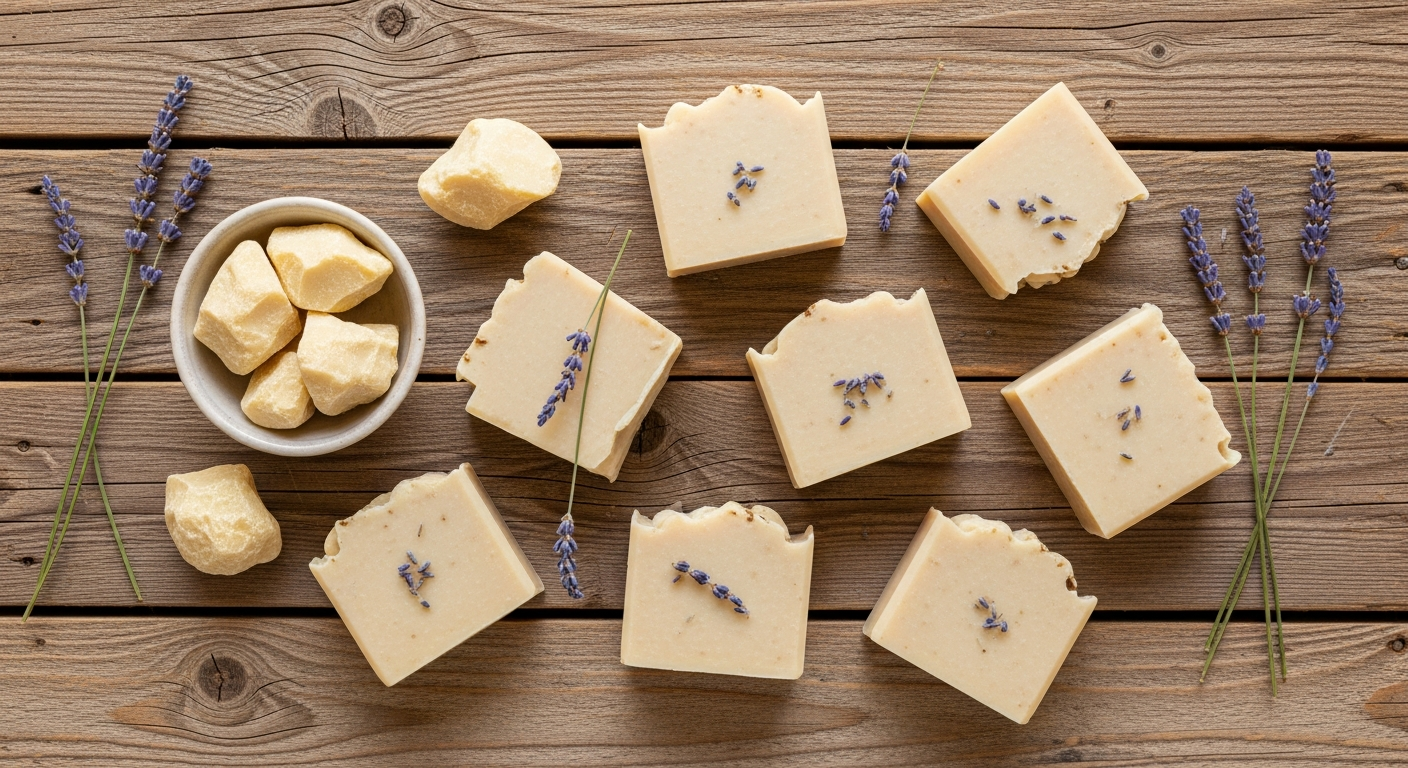
Unscented — If you use raw cocoa butter, the bars will have a natural, faint chocolate note. It's subtle and lovely on its own, especially for someone with fragrance sensitivities.
Lavender + Vanilla — The crowd-pleaser. Add lavender essential oil and a vanilla fragrance oil at trace, stir gently, and you've got a bar that works for everyone. This is my go-to for gifting.
Orange + Tea Tree — Bright, clean, and skin-supportive. A good morning shower bar. Citrus essential oils can fade over time, so use a generous amount at trace and expect the scent to mellow after cure.
Peppermint — A classic wake-up bar for the shower. Peppermint essential oil is one of the most stable in cold process — it holds well through the cure and doesn't accelerate trace.
What to Expect from Your Finished Bars
First batch expectations matter, so let me be honest about what you'll actually get.
Scent: Raw cocoa butter gives the cured bar a light, pleasant chocolate note — it's not overwhelming, just noticeable. Deodorized cocoa butter produces a scentless bar that lets your added fragrance shine through cleanly. Either way, expect the scent to mellow slightly during the cure. That's normal.
Lather: Cocoa butter bars produce a creamy, conditioning lather — not the big, fluffy foam you get from commercial body wash. If you're used to commercial soap or detergent bars, this will feel different at first, and in a good way. Your skin will feel moisturized, not stripped. Pair it with a good loofah and the lather picks right up.
Hardness: Cocoa butter makes a very firm bar that lasts longer than most homemade soaps. Let it cure the full 4–6 weeks — bars harden noticeably as they cure, and skipping the cure gives you a softer, harsher bar than you'd get with patience.
Color: Cold process bars made with raw cocoa butter will be cream to light tan. Don't be alarmed if your bars aren't stark white — that's the natural color of the oils, and it's completely normal. A full gel phase (from the towel wrap) will make the color more even and translucent.
Common Soap Making Mistakes to Avoid
- Using too much cocoa butter. Above 25% of total oils, bars get extremely hard and are prone to cracking, especially in cold climates. Stick to 10–25% and you'll get all the benefits without the brittleness.
- Combining lye and oils at the wrong temperature. Both should be between 100–110°F when you mix them. Too hot and the batter can overheat and seize; too cool and you'll have a hard time getting everything to blend evenly.
- Using fragrance oils that accelerate trace. Cinnamon, clove, and certain vanilla fragrance oils can seize soap in seconds — turning your batter into something resembling mashed potatoes before you can get it in the mold. Always test a new fragrance oil in a small batch first, and check supplier usage notes.
- Cutting too soon. Cold process soap needs at least 24–48 hours before you unmold and cut. Cut earlier and you'll get soft, uneven bars that don't hold their shape. Give it the full time.
- Skipping the cure. This is the most common beginner shortcut, and the one you'll regret most. Saponification finishes during the cure — soap used before 4 weeks is harsher, softer, and doesn't lather as well. The wait genuinely improves the bar.
FAQ
Can I use cocoa butter in soap making? Yes — it's one of the best additions for firm, long-lasting bars with a creamy, conditioning lather. Use it at 10–25% of your total oils in cold process, or choose a melt-and-pour base that already contains it for an even simpler route.
What happens if you add too much cocoa butter to soap? Bars with more than 25–30% cocoa butter become extremely hard and are prone to cracking, particularly as they cool. Limit your cocoa butter content to 10–25% and you'll get all the hardness and conditioning benefits without the brittleness.
Does cocoa butter make soap lather better? It improves lather quality — the lather becomes creamier and more conditioning — but not lather quantity (big bubbles). If you want both, pair cocoa butter with coconut oil. That combination gives you rich lather and a skin-softening feel.
Is homemade cocoa butter soap good for sensitive skin? Many people with sensitive skin do well with homemade cold process soap made from simple, gentle oils and no synthetic detergents. That said, if you have a tree nut allergy, check whether cocoa butter is safe for you specifically before using it on your skin.
Where can I buy lye for soap making? Food-grade sodium hydroxide is available on Amazon — search "Essential Depot lye" or "BrambleBerry lye" to find the right product. Some hardware stores also carry it, sold as drain cleaner, but make sure you're buying 100% sodium hydroxide with no additives before using it in soap.