How to Build a Chicken Coop In 5 Steps: Ultimate DIY Guide!
Are you ready to embark on a clucking good adventure? Then you might want to know how to build a chicken coop!
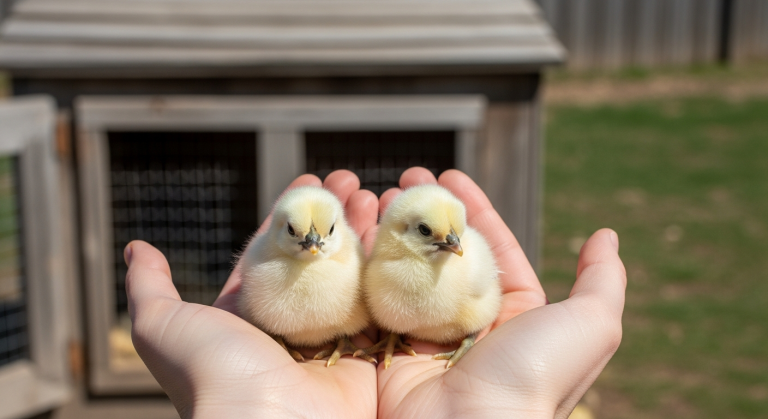
Building your own chicken coop isn’t just a project; it’s the first step towards fresh eggs and happy hens!
Did you know the average chicken coop can last up to 20 years with proper maintenance? That’s two decades of farm-fresh eggs right in your backyard!
Whether you’re a seasoned DIYer or a first-time builder, this guide will walk you through everything you need to know to create a cozy castle for your feathered friends.
So grab your hammer, and let’s get cracking on building the perfect chicken coop!
Planning Your Chicken Coop: Essential Considerations

When creating your building plans for your chicken coop, you’ll want to consider the following:
- Size
- Location
- Zoning laws and regulations
- Stationary vs. mobile coop design
Determining the size based on flock numbers
First, you have to figure out how big your coop needs to be! I made the rookie mistake of not planning for growth.
I started with three hens, thinking that’d be plenty. Fast forward a year, and I was cramming eight birds into a space meant for half that! Talk about a tight squeeze.
As a rule of thumb, you want about 2-3 square feet per chicken inside the coop and 8-10 square feet per bird in the chicken run. Trust me, your girls will thank you for the extra space!
Choosing the ideal location in your yard
The location for your coop is important as well. For example, don’t put your coop next to your vegetable garden! Otherwise your chickens will find every possible way to escape and demolish your tomatoes.
Put some distance between your coop and your prized plants. You’ll want a spot that’s well-drained, gets some shade during the hot parts of the day, and is protected from strong winds.
And make sure it’s close enough to a water source! Lugging heavy water buckets across the yard gets old real quick.
Understanding local zoning laws & regulations
It’s also important to check your local zoning laws, especially to see if there are restrictions on backyard livestock.
Some locations have rules about how far the coop needs to be from property lines or how many chickens you can keep. Do yourself a favor and double-check before you start building. It’ll save you a headache (and possibly a fine) down the road!
Deciding between a stationary or mobile coop design
When it comes to coop design, you’ve got two main options:
- Stationary: These coops are sturdy and can be more secure against predators, but it means your chickens are always scratching up the same patch of ground.
- Mobile (chicken tractor): These coops let you move your flock around, giving them fresh grass and bugs to munch on. Plus, your chickens will fertilize different areas of your yard!
Planning your chicken coop might seem overwhelming at first, but trust me, it’s worth taking the time to get it right! Your chickens will be happier, healthier, and more productive in a well-designed space. And you’ll save yourself a lot of headaches down the road.
5 Must-Have Features for a Functional Chicken Coop
After building three different coops (and making plenty of mistakes along the way), I’ve learned exactly what makes a coop work – and what definitely doesn’t!
Here are the must-have features you’ll need for a functional chicken coop:
- Proper ventilation systems
- Nesting boxes for egg-laying
- Roosting bars for sleeping
- Secure doors and windows
- Predator-proof design elements
1. Proper ventilation systems
When building your chicken coop, you might be tempted to seal it up tight against predators. While protecting your flock is essential, proper ventilation is equally crucial for maintaining a healthy environment inside the coop!
Chickens produce an incredible amount of moisture when they breathe. Good airflow helps reduce moisture buildup, which can lead to mold and respiratory issues in chickens. It also helps control odor and keeps the coop from becoming too hot in the summer or too cold in the winter.
Add ventilation holes or windows that make up about 1/5 of your wall space, positioned above roosting level. I use hardware cloth-covered openings near the roof peak, plus some lower vents on the opposite wall to create cross-ventilation.
Just make sure those openings aren’t creating drafts directly on your birds! These holes or windows allow for cross-ventilation while still ensuring they’re predator-proof to keep your birds safe.
2. Nesting boxes for egg-laying
Nesting boxes are not just cute little cubbies for your hens; they provide a safe, comfortable space where hens feel secure laying eggs, reducing stress, and encouraging consistent egg production!
I’ve found the magic ratio is one box for every 4-5 hens, even though they’ll probably all try to use the same one anyway (chickens can be such copycats!)
I’ve started using plastic mixing tubs inside wooden boxes for nesting box materials. It sounds weird, but they’re super easy to clean, don’t absorb moisture, and last practically forever.
Just drill some drainage holes in the bottom and screw them into your wooden frame. Add some pine shavings, and you’re good to go!
Position your nesting boxes about 24 inches off the ground, and make them roughly 12x12x12 inches. Any higher, and your hens might decide the floor looks more appealing!
3. Roosting bars for sleeping
Roosting bars are another crucial feature that needs some serious thought.
Chickens prefer flat roosts about 2-3 inches wide to cover their feet while sleeping. It helps prevent frostbite in winter and makes them feel more secure.
Mount them about 2 feet off the ground and higher than your nesting boxes (otherwise, guess where they’ll sleep!). Also, make sure you’ve got about 8-10 inches of roosting space per bird. Trust me, chickens get cranky when they’re cramped!
You’ll also want to install a droppings board under the roosts. It catches most of the overnight deposits and makes morning cleanup a breeze! Just scrape it off into your compost bin, and you’re good to go.
Read more:
4. Secure doors & windows
Doors and windows in your chicken coop are where things get serious.
Every opening needs two layers of protection: a solid door or window for weather protection and a predator-proof covering like hardware cloth. Don’t cheap out and use chicken wire—raccoons can tear through that stuff like paper!
Also, make sure your doors have predator-proof latches. Those raccoons are scary smart and can figure out simple locks. I like to use carabiners!
Windows need extra attention. If used for ventilation, windows should have secure screens and be locked shut when not in use. You might even want to caulk the windows shut for even more security!
Use solid wood for doors and other entry points. It’s more durable and secure than plywood or wood paneling!
One feature I absolutely love is my “clean-out door.” It’s a large door at the back of the coop that opens wide enough for me to get in there with a rake and wheelbarrow. It makes cleaning so much easier!
Last but not least, invest in quality hinges and latches! Those cheap hinges from the hardware store will rust up within a year.
Spend a little extra on galvanized or stainless-steel hardware. Your future self will thank you when you’re not out there WD-40ing squeaky hinges every month!
5. Predator-proof design elements
Speaking of predator-proofing, any gap larger than 1/2 inch is an invitation for trouble!
I wrap my entire run in 1/4 inch hardware cloth, including the top. Some people think that’s overkill, but hawks are a real threat in my area.
And most people forget that predators can dig! Extend your hardware cloth about 12 inches from the base of your run, then bury it or lay it flat and cover it with dirt or gravel. This creates an underground barrier that stops diggers in their tracks!
Feed Storage
One last tip: put your feed storage right at the coop!
I built a small attached shed with a lift-top lid, and it’s been a game-changer. No more trudging back and forth to the garage with heavy feed bags! Plus, keeping the feed close allows for easier access, so I can quickly replenish it to maintain freshness.
Just make sure it’s critter-proof. Mice and rats love chicken feed as much as the chickens do!
Here are some tips for building an effective feeding storage:
- Material: Use sturdy materials like metal or heavy-duty plastic that can withstand gnawing from rodents.
- Sealing: Ensure containers have tight-fitting lids to keep pests out and maintain the feed quality.
- Location: Position the storage in a shaded area to prevent heat and moisture from degrading the feed.
Remember that a functional coop isn’t just about keeping chickens in – it’s about keeping them healthy, happy, and safe while making your life easier. Every feature should serve a purpose, whether protecting your flock or saving you time on daily chores.
Read more:
- 5 Best Chicken Feeders for Happy, Healthy Hens in 2024
- What Can Chickens Eat? The Ultimate Food Guide for Chickens
- What Can Chickens NOT Eat? Foods to Avoid Feeding Chickens!
Selecting the Right Materials for Your Coop

After so many years working with chicken coops, I’ve learned more about building materials than I ever thought I’d need to know! Here are the best materials you’ll want to use for your coop to avoid expensive mistakes.
Wood options: treated vs. untreated lumber
I used untreated pine on the first coop I built because I was worried about chemicals near my chickens. But you’ll never guess what happened! That coop started rotting within two years, especially where the wood contacted the ground.
Here’s the deal: pressure-treated lumber is actually fine for the frame and any ground contact points. The modern stuff (ACQ-treated lumber) is way safer than the old arsenic-treated wood.
Just don’t use it where chickens might peck at it! Avoid it for nesting boxes and roosts.
For those interior elements, I use cedar or cypress. They’re pricier, but they’re naturally rot-resistant and smell amazing!
Roofing materials: metal, shingles, or plastic
My first coop had asphalt shingles because that’s what was on my house. But that was a big mistake! They made the coop way too hot in summer and were super heavy.
These days, I’m all about corrugated metal roofing. It’s lightweight, reflects heat, and lasts forever!
Just make sure you get the proper screws with rubber washers to prevent leaks. You’ll also want to extend your roof overhang by at least 12 inches on all sides. It keeps rain away from your walls and gives your girls some shelter when they’re hanging out in the run!
Flooring choices: wire mesh, concrete, or wood
I started with a dirt floor in my first coop because it seemed “natural.” Well, it didn’t help much trying to keep predators out!
Now, I use different flooring systems depending on the area:
- For the main coop, I’ve got a raised wood floor made of 3/4 inch exterior-grade plywood sealed with a pet-safe polyurethane. It stays dry and is easy to clean. But don’t just slap plywood down! You need cross-ventilation underneath to prevent moisture buildup and rot.
- For the run, I learned that hardware cloth is your best friend. I lay it under about 6 inches of dirt and sand. The chickens can scratch and dust bathe naturally, but nothing’s digging its way in from below!
Some people swear by concrete floors, but I find them too cold and hard on chicken feet. Plus, they’re permanent. If you ever want to move your coop, you can’t!
Insulation options for climate control
Chickens are pretty tough, but good insulation makes your life easier.
In my current coop, I’ve got faced fiberglass insulation in the walls (with the paper facing the outside), covered by 1/2-inch plywood on the inside. This setup helps keep the coop warmer in winter and cooler in summer. Just make sure your chickens can’t get to the insulation, or they’ll try to eat it!
Building a coop is kind of like building a tiny house. It needs to be sturdy, weather-resistant, and practical.
Don’t get too caught up in making it pretty. Focus on using materials that will last and make your chicken-keeping life easier!
How To Build A Chicken Coop in 5 Steps
Building my first chicken coop was quite the adventure! But after constructing several coops (and learning from some pretty epic fails), I’ve got the process down to a science.
Let me walk you through exactly how to build a coop that’ll last for years.
Step 1: Create a solid foundation
Every chicken coop needs a solid foundation. If you just plopped the coop right on the ground, it’ll sink to one side within months!
Start by creating a level base using concrete deck blocks. I place them at each corner and every 4 feet along the sides, ensuring they’re perfectly level using a string line and level.
Pro tip: Use crushed gravel under each block for better drainage. To prevent rot, you want the coop elevated at least 6 inches off the ground.
Step 2: Frame the walls & roof
For the frame, I use 2×4 pressure-treated lumber for anything that might contact the ground or moisture.
- First, I create a rectangular base frame on those deck blocks. I secure it with galvanized lag screws.
- Then comes the wall framing. I space my studs 16 inches on center (measuring from the center of one stud to the center of the next). You don’t want wobbly walls!
- Next, I install a moisture barrier. I wrap the entire frame in house wrap before adding the exterior siding. It’s an extra step, but it’ll add years to your coop’s life!
- For the siding, I use T1-11 exterior-grade plywood. It’s sturdy and gives that classic barn look!
Step 3: Installing the roofing
The roof frame is where things get interesting.
I build trusses using 2x4s, creating a peak with at least a 4/12 pitch (it rises 4 inches for every 12 inches of horizontal run). This steep pitch helps snow and rain slide right off!
Remember that overhang I mentioned earlier? I extend my rafters 12 inches beyond the walls. Your chickens will appreciate that covered “porch” area during rain showers!
For the actual roofing, I attach 1/2 inch plywood sheathing across the rafters, cover it with roofing felt (don’t skip this step!), and then install metal roofing panels. Make sure you use roofing screws with rubber washers and overlap your panels properly. There is nothing worse than a leaky roof over your nesting boxes!
Step 4: Setting up nesting boxes & roosting bars
Nesting boxes
Speaking of nesting boxes, I build these after the main structure is up. I make them about 12x12x12 inches and mount them about 24 inches off the floor.
A trick I learned is to slope or hinge the tops of the nesting boxes to prevent chickens from roosting on them. Trust me, you don’t want to clean up that mess every morning!
Roosting bars
For the roosting bars, I use 2x4s turned on their side (so the 4-inch side is facing up). This gives the chickens a nice flat surface to grip.
I mount them using brackets that let me remove them easily for cleaning. They’re positioned higher than the nesting boxes and spaced about 10 inches from the wall and 18 inches apart if you’re adding multiple rows.
Step 5: Adding doors, windows, & ventilation
Ventilation
I install adjustable vents near the roof peak and lower wall vents on the opposite side. All vents are covered with 1/4-inch hardware cloth (securely stapled and framed to prevent predators from pulling it off).
Windows
I also add windows that can be opened in summer and closed in winter. Double-pane plexiglass works great! It’s lightweight and won’t shatter.
Doors
The doors are crucial for both you and your chickens.
Human Door
I make a human-sized door that’s at least 24 inches wide (trust me, you’ll appreciate the extra space when you’re lugging feed bags or cleaning).
Chicken Door
For the chicken door, I build a small pop door that’s about 14×14 inches. Both the human-sized door and the chicken door get predator-proof latches. I use barrel bolts for the pop door and a good hasp with a carabiner for the main door.
Cleanout Door
One of my favorite features is the cleanout door I install at the back of the coop. It’s basically a large panel that hinges open, letting me rake everything right into a wheelbarrow. Believe me, your back will thank you for this addition!
I add hardware cloth to every possible opening and bury it 12 inches deep around the perimeter. I then attach it using washers and screws every 4 inches. No shortcuts here! A predator only needs to find one weak spot to turn your coop into an all-you-can-eat buffet.
Taking your time during construction pays off big time in the long run. My first coop took a weekend to slap together. My latest one took a week, but it’s been standing strong for five years with minimal maintenance. And that’s the kind of investment that makes chicken keeping a joy instead of a chore!
Essential Tools & Equipment for Coop Construction

Here are the essential tools you’ll need for your chicken coop construction:
- Titanium hammer
- Cordless Drill/Driver
- Circular Saw
- Safety glasses
- Respirator
- Work gloves
- 25-foot tape measure
- Levels
- Utility Knife
- Drill Bit Set
- Carpenter’s Pencil & Sharpener
- Tool Belt or Apron
Titanium hammer

You’ll need a good hammer, and I’m not talking about that lightweight one from your kitchen drawer! Get yourself a 16-ounce framing hammer.
I used an old Estwing for years until I finally splurged on a titanium one.
Worth.
Every.
Penny.
Fun fact: Did you know that a titanium hammer transfers 97% of the energy from a swing, compared to only 70% with a steel hammer? The reduced arm fatigue makes a huge difference when you’re hammering all day!
Cordless Drill/Driver

Power tools are game-changers. The first one you need is a cordless drill/driver.
Get one with at least 18 volts. I learned this lesson the hard way when my cheap 12-volt drill died halfway through installing the roof.
Nowadays, I actually keep two drills charged up: one for drilling pilot holes and another for driving screws. Sounds excessive? Not when you’re switching bits every five minutes!
Circular Saw

Here’s something I wish I’d known sooner: a circular saw is absolutely essential! My first coop took forever because I was using a handsaw for everything.
A good circular saw will make straight cuts faster and more accurately. Pro tip: Spend the extra money on a blade designed for treated lumber—it’ll last longer and cut cleaner!
And please, PLEASE get a speed square to guide those cuts. My first attempts at freehand cutting looked like I’d done them blindfolded!
Safety equipment for DIY builders

Let’s talk safety equipment because, trust me, a trip to the ER ruins a perfectly good building day!
Safety glasses are non-negotiable. I’ve had more than one screw bounce back at my face! Get comfortable ones that don’t fog up.
And those cheap disposable dust masks? Skip ’em.
Invest in a proper respirator, especially if you’re cutting treated lumber or installing insulation. Your lungs will thank you!
Work gloves are also essential, but here’s the trick: get a few different pairs.
Here are the types of work gloves I use:
- Leather gloves for handling rough lumber.
- Mechanic-style gloves for detail work.
- Heavy-duty rubber gloves for treating wood or applying sealants.
And don’t forget knee pads! I ignored this advice until I spent a week walking like a robot after installing flooring.
Measuring & marking tools for accuracy

Accuracy makes or breaks a project. That’s where measuring and marking tools come in!
Here are the essential tools you’ll need for measuring and marking your chicken coop:
- 25-foot tape measure
- Laser level
- 4-foot level
- Torpedo level
- Utility knife
- Drill Bit Set
- Carpenter’s Pencil
- Pencil sharpener
- Tool belt
- Apron
25-foot tape measure
A good 25-foot tape measure is essential. I keep two in my tool belt because they mysteriously disappear right when you need them most!
Get one with a magnetic end. It’s super helpful when you’re measuring by yourself!
Laser Level
Something else that’s revolutionized my building process: a laser level. It sounds fancy, but it’s amazing for laying out your foundation and making sure your walls are straight!
Before getting one, I used a regular bubble level and string lines. Talk about time-consuming! The laser level paid for itself in saved time and frustration.
Speaking of levels, get yourself these two as well:
- A 4-foot level: This long level is great for walls and posts
- A torpedo level: Perfect for smaller stuff like nesting boxes.
Don’t cheap out here! There’s nothing worse than realizing your level isn’t actually… level.
Utility Knife
One tool that doesn’t get enough love is a good utility knife.
I keep two in my tool belt:
- One with a fresh blade for precision cuts on things like hardware cloth.
- One with an older blade for rough cuts.
And buy plenty of extra blades! Nothing’s more frustrating than cutting screen material with a dull blade.
Drill Bit Set
You also need a good drill bit set, including spade bits for bigger holes! Don’t buy those cheap bits from the dollar store. They’ll be toast after your first day of drilling through treated lumber!
Five years ago, I splurged on a quality set, and they’re still going strong.
Carpenter’s Pencil & Sharpener
I swear by carpenter’s pencils for marking. Regular pencils snap too easily, and pens bleed in the rain.
And keep a pencil sharpener in your tool belt. Sharpening a carpenter’s pencil with your utility knife usually results in bandages!
Tool Belt or Apron
Last but not least, get yourself a sturdy tool belt or apron! Constantly climbing up and down your ladder to grab tools gets old really fast.
I use one with plenty of pockets and a hammer loop. It’s lightweight and comfortable, and it will help you work faster and more efficiently. Plus, you’ll feel like a proper builder wearing it!
Good tools make for good work. You don’t need to buy everything at once, but start with the basics and add as you go.
Also, keep your receipt for that cheap tool you’re tempted to buy. You’ll probably be exchanging it for the better version sooner than you think!
Customizing Your Coop: 11 Design Ideas & Add-ons!

Let me tell you about my coop customization journey! What started as a basic shelter has turned into what my wife lovingly calls my “chicken palace.”
I’ve tried all sorts of add-ons over the years – some brilliant, some… well, let’s just say they seemed like good ideas at the time!
Here are some fun, creative coop design ideas and add-ons you can try:
- Paint & decoration options
- Automatic doors for convenience
- Solar lighting for extended daylight
- Rainwater collection systems
- Herb gardens for chicken health
- A “Broody Breaker”
- A “Rodent-Proof Feed Station
- Ceiling Fan
- A “Spa Corner”
- A “Green Roof”
- “Chicken TV”
1. Paint & decoration options
To paint the coop, I use exterior paint rated for barns. I tend to use light colors that reflect heat better than dark ones. Our coop is a cheerful light blue with white trim, and it stays noticeably cooler in summer!
Just remember to use paint that’s safe for chickens! They’ll peck at anything. I always use water-based paints over oil-based ones due to their non-toxicity and lower risk of harmful fumes.
2. Automatic doors for convenience
The automatic door opener I got was a total game-changer!
I resisted this upgrade for years, thinking it was an unnecessary luxury. Then, I went on vacation and had to get my neighbor to let my chickens out at dawn every day.
The day I got back, I bought an automatic door opener! I use a photosensor model that opens at dawn and closes at dusk.
A word of warning: check that door EVERY day. If you don’t, it might get stuck open, and raccoons will be in your coop!
3. Solar lighting for extended daylight
Speaking of lighting, solar is the way to go!
I installed small solar-powered LED lights inside the coop to extend daylight hours during winter. This helps maintain egg production when days get shorter. The setup is super simple: just a small solar panel on the roof connected to LED strips!
Just don’t make the lights too bright. Chickens need darkness for adequate rest. I use red lights now, which are less disruptive to their sleep patterns.
4. Rainwater collection systems
The rainwater collection system I made might be my proudest DIY achievement:
- I attached gutters to the coop roof that feed into a 55-gallon food-grade barrel.
- I then added a mesh screen at the top to filter out debris (trust me, you don’t want to skip this step! I once had to clean out a barrel full of decomposed leaves).
- The barrel has a spigot at the bottom that feeds directly into their water dishes. During summer, this system provides almost all the water my flock needs!
5. Herb gardens for chicken health
I also planted lavender, mint, and oregano around the coop base. The herbs help repel insects naturally, and the chickens love nibbling on them.
Some people say herbs boost chicken immunity. I don’t know about that, but my girls seem healthier since I added the garden!
Just make sure to protect young plants until they’re established, or your chickens will destroy them!
6. A “Broody Breaker”
One of my favorite additions is the “broody breaker.” It’s a small cage with a wire bottom that sits off the ground.
When one of my hens goes broody (refuses to leave the nesting box), she gets a little vacation in there! The airflow from below helps cool her down and usually breaks the broody behavior within a day or two.
It’s much better than my old method of constantly shooing them out of the nesting boxes!
7. A “Rodent-Proof Feed Station
For feed storage, I built what I call the “rodent-proof feed station.” It’s an attached cabinet with a sloped roof and a lift-top lid.
Inside, I keep metal garbage cans for feed storage. The lid is heavy enough that raccoons can’t lift it (I learned that one through trial and error), and the metal cans keep mice from sneaking in.
Bonus: it keeps the feed dry and convenient!
8. Ceiling Fan
Here’s a fun one: I installed a ceiling fan in the coop!
Okay, it’s just a small battery-operated fan, but it makes a huge difference in summer. I mounted it high enough that the chickens can’t reach it, and it keeps the air moving on those sticky August nights.
Just remember to check the batteries regularly. There’s nothing worse than a heat wave with a dead fan!
9. A “Spa Corner”
I’ve also added what I call the “spa corner” in their run. It’s a designated dust bathing area filled with fine sand, wood ash, and food-grade diatomaceous earth. The chickens absolutely love it!
I covered this area with a small roof to keep it dry. When I see them all taking their dust baths together, it looks like a little chicken beach party!
10. A “Green Roof”
One of my recent additions is a “green roof” over part of the run. I planted some hardy sedums up there, and they not only look beautiful but help keep the run cooler in summer!
Just make sure your structure can handle the extra weight of soil and plants when they’re wet! Reinforcing the roof with extra supports may be necessary to prevent sagging or structural damage.
11. “Chicken TV”
The latest project is what I’m calling the “chicken TV.” It’s a clear plexiglass window at chicken-eye level where I hang different treats and toys! It keeps them entertained during bad weather and gives them something to do besides picking on each other.
Who knew chickens could spend hours watching a hanging cabbage swing back and forth?
At the end of the day, customizing your coop should be fun but functional.
Start with the basics and add features as you learn what your flock needs. And don’t be afraid to get creative! Some of my best ideas came from watching how my chickens behave and thinking, “How can I make this better for them?”
Maintaining Your Chicken Coop for Longevity

Here’s what I do to maintain my chicken coops for longevity.
Regular cleaning schedules
Let’s dive into cleaning schedules because this is where most people (including past me) go wrong.
I used to think a monthly deep clean was enough. Think again! Now, I have a daily, weekly, and quarterly system that keeps things manageable.
Daily Cleaning
Every morning, I do what I call my “two-minute tidy”:
- A quick poop board scrape.
- A quick check for broken eggs.
- Done!
This simple habit has saved me countless hours of scrubbing dried-on messes.
Weekly Cleaning
For weekly cleaning, I’ve got my Saturday morning routine down pat.
First, I rake out all the old bedding. In winter, I use the deep litter method, but in summer, I clean it out weekly.
Pro tip: keep your wheelbarrow right outside the clean-out door! I wasted so much time in the beginning, carrying things back and forth in buckets. Now, I can clean the whole coop in about 20 minutes.
Quarterly Deep Cleaning
And let’s not forget about the importance of a quarterly deep clean!
Four times a year, I remove everything from the coop—everything! Then, I use my shop vac (dedicated to coop duty) to clean every corner and crack.
You wouldn’t believe the stuff that accumulates in those hidden spots!
Annual maintenance checks
Annual maintenance is crucial for making your coop last.
Every spring, I do what I call my “top-to-bottom inspection.” I check every inch of that coop like a building inspector!
Start at the roof and look for any loose screws or panels. One loose screw can let in enough water to rot your roof structure!
Speaking of water damage, check all your seals and weatherstripping annually. I mark this task on my calendar because it’s easy to forget.
Last year, I noticed a small gap around one window frame. I fixed it in five minutes with some new weatherstripping. That little gap could have turned into a big repair job if I’d left it!
Seasonal preparations for weather changes
Now, let’s talk seasonal prep because this is where planning ahead really pays off.
Winter Prep
In late summer, I start getting ready for winter.
I check all insulation, seal any drafty spots (while maintaining proper ventilation!), and make sure my heat-safe lighting is working. There is nothing worse than trying to fix coop issues in freezing weather!
Summer Prep
For summer prep, I focus on ventilation and shade.
In spring, I install shade cloth over parts of the run before it gets too hot. I also make sure all my ventilation windows and screens are in good repair. Those determined little sparrows will find any hole in your screening!
Pest control measures
Pest control is ongoing, but there’s a rhythm to it.
Mice Holes
In early spring, I do a major defense check, looking for any holes where mice might have gotten in during winter. I keep a caulk gun handy and seal everything suspicious.
Here’s a trick I learned: stuff any holes with steel wool before caulking. Mice hate chewing through it!
Insect Control
For insect control, I carefully use food-grade diatomaceous earth in problem areas. I use it strategically around the coop’s base and in corners where I’ve spotted mites.
My 3 Tips for Consistent Maintenance
Tip #1: Keep a maintenance log
Here’s something that took me years to figure out: keep a maintenance log!
I have a simple notebook where I track my progress on various tasks. It helps me spot patterns—like that one corner that always seems to need extra attention—and reminds me when it’s time for regular maintenance tasks.
Tip #2: Get a Basic Tool Kit
One of my best investments was a basic tool kit that lives right in my feed storage area. Having the right tools handy means I can fix small issues before they become big problems!
It’s just a hammer, screwdriver, pliers, and a few other basics, but they’ve saved my bacon more times than I can count!
Tip #3: Get To Know Your Local Hardware Store
And here’s my final piece of advice: develop a relationship with your local hardware store! I’m on a first-name basis with the people at mine.
When I notice something starting to wear out, I buy the replacement before I need it. There’s nothing worse than discovering your coop door hinge is broken on a Sunday evening when the hardware store is closed!
Consistent maintenance might seem like a pain, but it’s way easier than major repairs. Trust me, I’ve done both!
Time to Build Your Chicken Coop!
There you have it: How to build a chicken coop! You’re now equipped with all the knowledge you need to build a top-notch chicken coop.
Creating the perfect home for your feathered friends is an investment in their health, happiness, and egg-laying productivity.
As you embark on this exciting project, remember that every nail you hammer and board you place is a step towards self-sustainability and the joy of fresh eggs!
And don’t be afraid to get creative and make the coop your own. After all, happy chickens make for a happy home!
It’s time to roll up your sleeves, gather your materials, and prepare to build a coop that’ll have your chickens strutting with pride!
Happy building, and may your future be filled with contented clucks and delicious, homegrown eggs!
Frequently Asked Questions
Is it cheaper to build your own chicken coop?
Yes, it is generally cheaper to build your own chicken coop. Building a coop typically costs about half of what you would spend on a ready-made coop, especially if you use recycled materials or build from scratch!
How do you make a chicken coop for beginners?
To make a chicken coop for beginners, choose a suitable plan and gather necessary materials like wood, nails, and hardware cloth. Then, construct a sturdy frame, add walls and a roof, install nesting boxes and roosts, and ensure proper ventilation and access for cleaning and egg collection.
Is a 4×8 coop big enough for 12 chickens?
A 4×8 chicken coop provides 32 square feet of space, which comfortably accommodates 8 to 10 medium-sized chickens. However, for a flock of 12 chickens, it is recommended to have at least 36 square feet so that the coop may be slightly undersized for optimal comfort and health.
What size coop for 6 chickens?
A coop should ideally provide 12 to 24 square feet of interior space for six chickens. A recommended size is 4′ x 6′ or larger, which ensures they have enough room to move comfortably and engage in natural behaviors.