What Is a Water Sealed Fermentation Crock (and Is It Worth the Upgrade)?
Last updated: March 12, 2026
I fermented in mason jars for two full seasons before I finally picked up a water seal crock. Honestly, I wasn't sure I needed one — my sauerkraut was turning out fine, the jars were easy to wash, and I already had a system that worked. Then a fellow homesteader offered me her 10-liter crock, and I figured I'd give it a try.
After the first batch, I got it. The flavor was noticeably deeper. I didn't have to open the crock and press the cabbage back down every few days. And there was something satisfying about hearing that quiet burbling sound coming from the kitchen — the crock just taking care of itself while I went on with my day.
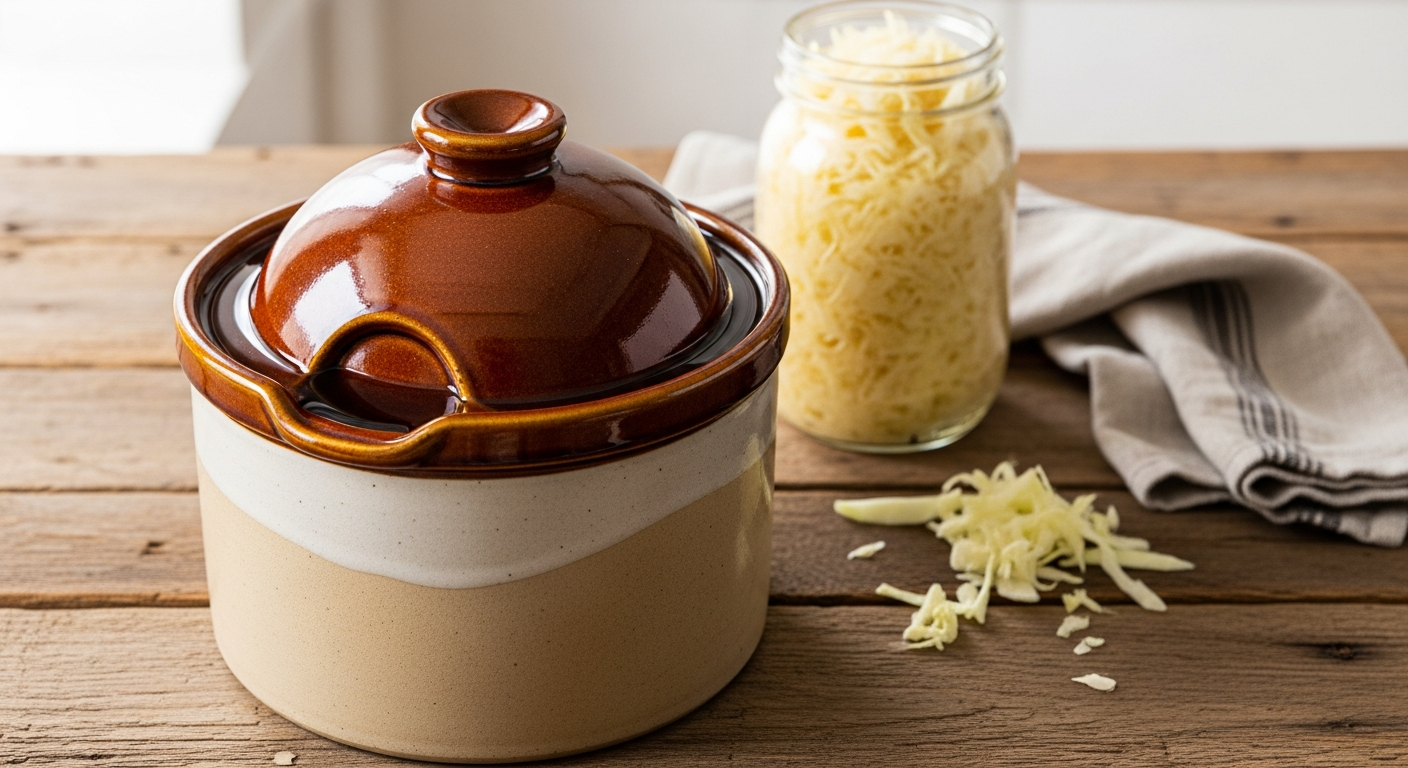
A water seal fermentation crock is a ceramic or stoneware vessel with a small water-filled moat around the rim, designed to create an airtight, self-maintaining airlock for fermenting vegetables. Whether it's worth upgrading to one depends on how much you're fermenting and how hands-off you want to be. Let me walk you through both.
What Is a Water Sealed Fermentation Crock?
The design is simple: the crock has a shallow water channel — called a moat — that runs around the top opening. The lid sits down into that moat, and when the moat is filled with water, it creates an airtight seal. Carbon dioxide produced during fermentation can bubble up through the water and escape, but air, dust, insects, and surface mold can't get in. It's essentially a built-in airlock — the same concept as the airlocks you'd use on a mason jar, just integrated directly into the crock.
This design originated in Germany and Poland and has been used for centuries. It's not a fermentation trend or a new kitchen gadget. Families in central Europe have been making sauerkraut this way for generations, and there's a reason it stuck around.
Open Crock vs. Water Seal Crock: What's the Difference?
An open crock is any wide-mouthed vessel — a smooth-sided ceramic crock, a slow cooker insert, even a food-grade bucket — where the top is left open or loosely covered. You weigh the vegetables down under the brine, cover it with a cloth or plate, and check it regularly. A water seal crock has a purpose-built lid that sits in the moat, forming that airtight barrier automatically. Both styles ferment vegetables perfectly well. The water seal version is simply more hands-off and produces consistently better results when you're making larger batches.
Water Seal Crock vs. Mason Jar Fermentation: Which Is Better?
Both work. I'm still using both, depending on what I'm making and how much of it. Here's the honest breakdown:
| Mason Jar | Water Seal Crock | |
|---|---|---|
| Best for | Small batches (1–2 quarts) | Large batches (2+ quarts) |
| Monitoring | Open and press down every few days | Check water moat every 1–2 days |
| Visibility | Can see ferment progress | Blind — listen for burping |
| Flavor | Great | Noticeably better on large batches |
| Cost | Free (you already have them) | $45–$80 for a quality starter crock |
| Cleaning | Easy | Moat is harder to clean |
Here's my honest take after using both for years: if you're making a quart of sauerkraut every few months, stay with your mason jars. You don't need this. But once you start batch fermenting — 5 or more pounds of cabbage at a time — the water seal crock is genuinely worth it. You stop babysitting it. You get a better ferment. And it looks beautiful sitting on your counter, which doesn't hurt.
What Size Water Seal Fermentation Crock Do You Need?
This is the question most articles skip over, and it matters more than people realize. A crock that's too small means you're making multiple batches when one would do. A crock that's too large is unwieldy and a pain to store.
| Your situation | Crock size | What you'll get |
|---|---|---|
| Just trying it out, 1–2 people | 2L (~½ gallon) | About 1 quart of sauerkraut |
| Most homesteaders (family of 3–4) | 5L (~1⅓ gallon) | About 2 quarts of sauerkraut |
| Big batches, family of 5–6 | 10L (~2½ gallon) | About 5 quarts of sauerkraut |
| Homestead scale or serious fermenter | 15–20L | 8–10 quarts |
For most families I know — mine included — the 5-liter crock is the right starting point. It's big enough to make a meaningful batch in one go, small enough to fit on your counter without taking over the kitchen, and easy enough to lift when it's full. If you have a larger family or you know you'll be fermenting regularly through fall and winter, consider going up to a 10-liter from the start.
How to Use a Water Seal Fermentation Crock (Step by Step)
Once your ferment is prepped and ready to pack — salted, massaged, brined — the crock-specific process is straightforward. Here's how it goes:
-
Set the crock on a rimmed baking sheet before you start. Ferments expand and occasionally overflow during active fermentation. The tray saves you a mess you don't want to clean up.
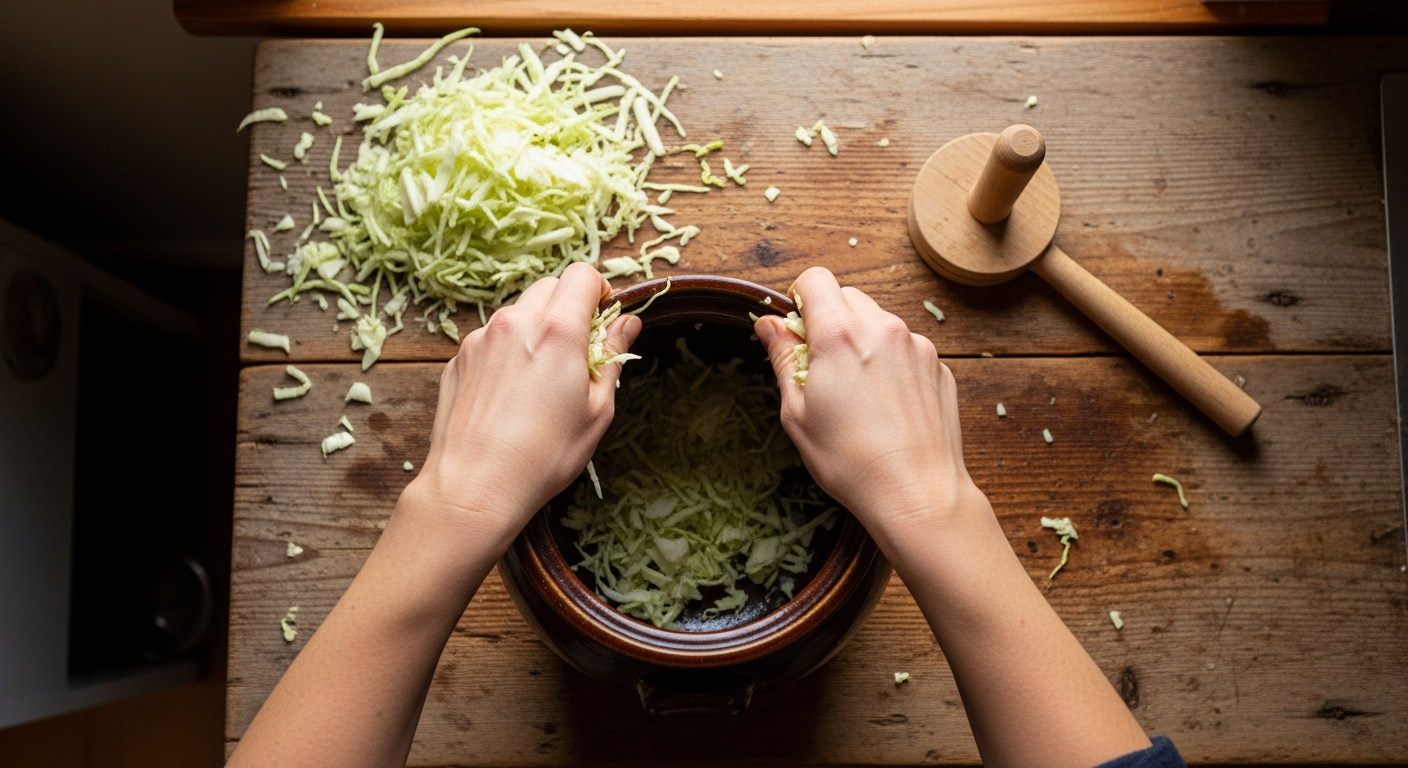
-
Pack your ferment into the crock firmly. Press down as you go to eliminate air pockets. The more tightly it's packed, the more brine will rise to the surface.
-
Weigh everything down with the included stones. The brine needs to cover the vegetables completely. The two semicircle weights that come with most starter kits are designed specifically to fit through the crock's opening — they're not optional.
-
If small pieces keep floating up, lay a large cabbage leaf or a piece of plastic wrap on top of the shredded vegetables, between the food and the weights. This keeps everything tidy and submerged.
-
Place the lid into the moat and fill the moat with clean water until it's about three-quarters full. You want enough water to maintain the seal, but not so much that it splashes out when you move the crock.
-
Find a good home for your crock: a cool, consistent spot between 65–75°F, out of direct sunlight. A kitchen counter works, but a basement or pantry is even better in summer.
-
In the first 2–3 days, you should hear occasional gurgling or bubbling — that's CO2 escaping through the water seal. It means fermentation is active. If you hear it, you're doing everything right.
-
Check the moat water every 1–2 days. It evaporates faster than you'd expect, especially in a warm kitchen. Just top it off with clean water as needed.
Timing: sauerkraut typically takes 2–4 weeks at room temperature. A warm kitchen in summer will ferment faster — closer to 2 weeks. A cool basement in fall or winter may take the full 4 weeks. Let your taste buds be the final judge.
What Can You Ferment in a Water Seal Crock?
Sauerkraut is the classic — and it's what most people start with — but it's far from the only option. The crock handles any lacto-fermented vegetable beautifully:
- Sauerkraut (shredded green or red cabbage with salt)
- Kimchi (same process, bolder spice profile)
- Brined pickles (whole or sliced cucumbers, green beans, carrots — packed in a saltwater brine rather than their own juice)
- Mixed vegetable ferments — a summer harvest medley of whatever's coming in at once
- Fermented garlic (whole cloves in brine)
- Curtido (Central American-style fermented slaw with cabbage, carrots, and onion)
If you can ferment it in a mason jar, you can ferment it in this crock. The crock just does it at a larger, more hands-off scale.
Water Seal Crock Problems (and How to Fix Them)
These are the questions that come up once you actually start using a crock — things most articles don't address until you're standing in the kitchen at 10pm wondering if you just ruined two weeks of work.
The water in my moat dried out while I was away — is my ferment ruined?
Probably not. Fermentation without a water seal is literally how it's been done for centuries. Open it up and smell it. If it smells sour and tangy, it's still good. If it smells rotten or genuinely putrid — not just "really sour," but off-putting in a different way — trust your gut and toss it. Your nose will know the difference.
There's white foamy stuff on the surface — is it mold?
White film or foam is usually kahm yeast, which is harmless. It looks alarming but won't hurt the ferment. Skim it off if you want, then seal the crock back up. Fuzzy, colored mold — green, black, or pink — is a different story. Scoop it out and check underneath. If the mold is only on the surface and the vegetables below are still submerged in brine and smell fine, you may still be okay. When in doubt, discard and start over.
It's been three weeks and nothing is bubbling anymore — is it done?
Probably yes. Open it and taste. If the flavor is pleasantly sour and you like it, it's done. Transfer it to jars and refrigerate. If you want it more sour, seal the crock back up and give it a few more days.
The smell coming from my crock is really intense — is that normal?
A strong sour smell is completely normal. That's lactic acid doing exactly what it's supposed to do. The smell that signals a problem is different — rotten, putrid, or off in a way that's clearly not just "very fermented." You'll know the difference when you smell it.
Cleaning and Storing Your Water Seal Crock
During use: Rinse the outside and the water moat with warm water only. No dish detergent — ever. This is the one rule that matters most. Stoneware is porous, and it will absorb soap, which affects the flavor of your next ferment. Warm water is all you need for routine cleaning between batches.
Between ferments: Rinse thoroughly with warm water, then let it dry completely before storing. If you had a failed ferment — visible mold that penetrated the food, or an off smell you couldn't identify — a rinse with diluted white vinegar will sanitize without leaving residue.
Storage trick: When you're not using the crock, place a folded paper towel in the moat so the lid doesn't sit fully closed. This allows a little airflow inside the stored crock, which prevents mold from growing in the dark, damp space between ferments.
Frequently Asked Questions
Is a water seal fermentation crock actually worth it?
If you're batch fermenting regularly — packing 5 or more pounds of vegetables at a time — yes, it's genuinely worth it. The results are better, it requires less daily attention, and it handles large volumes in a way that mason jars can't. If you're making a single quart of kraut a few times a year, your mason jars are doing the job fine.
What's the best water seal fermentation crock for beginners?
Look for a set that includes the crock, lid, and two semicircle weights. The 5-liter size is the right starting point for most families. Quality stoneware crocks in this size run $45–$75 on Amazon, and the well-reviewed options in that range hold up for years.
Can I ferment kimchi in a water seal crock?
Yes. The process is the same as sauerkraut — pack it in, weigh it down, seal it, wait. Kimchi's spicier ingredients don't affect the crock at all. Just clean it well between ferments if you're switching from a strong-flavored batch to something milder.
How long does sauerkraut take to ferment in a water seal crock?
Typically 2–4 weeks at room temperature. Warmer conditions (a 70°F+ kitchen in summer) will get you there in about 2 weeks. A cool basement in fall or winter may take the full 4 weeks. Start tasting at the 2-week mark, and pull it when the flavor is right for your preference.
Does a water seal crock set come with everything I need?
Most starter sets include the crock, lid, and two semicircle weights. Always check before buying — "crock body only" listings don't include weights, and the custom-fit weights are important for keeping food properly submerged. A cabbage tamper is a nice extra, but a small mason jar or your fist gets the job done just as well.