How to Make a Lotion Bar: Easy Beginner Recipe for Soft, Nourished Skin
Last updated March 10, 2026
I was standing at a craft fair booth a couple years ago, picking up a small round lotion bar and wondering what it was. The woman behind the table explained it — solid lotion, melts on contact with skin, three ingredients, no preservatives. I turned it over and saw the price tag: $14 for one bar. I set it down, smiled, walked to my car, and immediately started Googling how to make them myself. That batch cost me about $18 total and made ten bars.
That’s the whole pitch for homemade lotion bars: one boutique bar costs what your entire batch costs. And they’re genuinely easy to make — not “easy if you’re already a soapmaker” easy, but anyone-who-can-melt-chocolate easy. Three ingredients, twenty minutes of active time, and no equipment you don’t already own.
If you’ve been curious about lotion bars — maybe you’ve seen them at Lush or a local market and wondered what you’re actually looking at — this is the guide to making your first batch. We’ll cover the basic recipe, how to customize it, what to do if something goes wrong, and how to package them up as gifts. By the end, you’ll have everything you need to make a batch this weekend.
| Yield | ~8–10 bars or six 2-oz tins |
| Active time | ~20 minutes |
| Skill level | Complete beginner |
| Shelf life | 9–12 months |
| Cost to make | ~$15–$25 total batch |
| Gift-friendly? | Yes |
What Is a Lotion Bar (and Why Make Your Own)?
A lotion bar is a solid moisturizer — it looks a bit like a bar of soap, but there’s no lye, no water, and no preservatives. You rub it between your palms or directly on a dry area, and the warmth of your skin melts it just slightly, leaving behind a layer of conditioning oils and butter. It softens dry patches, soothes cracked spots, and absorbs within a minute or two. Think of it as concentrated moisture you apply with your hands rather than squeeze from a pump.
What does a lotion bar do, exactly? It does what any good moisturizer does — hydrates and protects dry skin — but it does it without the water content that most commercial lotions depend on. Because there’s no water in the formula, you don’t need preservatives to prevent bacteria growth. That’s both a safety win and a shelf-life win: a well-made lotion bar lasts 9–12 months at room temperature.
The cost case is straightforward. A lotion bar at Lush runs $10–$14 for a single bar. A small-batch artisan bar at a craft fair typically runs $12–$16. A homemade batch of 8–10 bars costs $15–$25 total — mostly in the initial ingredient purchases, with enough beeswax and butter left over for a second batch. If you make them as gifts, you’re giving something that genuinely feels thoughtful and handmade for about $2–$3 per bar. And you know exactly what’s in them.
If you can melt chocolate, you can make a lotion bar. The process is almost identical — melt, stir, pour into molds, let cool. The learning curve is real but short.
What You’ll Need
The 3 Core Ingredients
Lotion bars always start with three things: a wax, a butter, and a carrier oil. The wax gives the bar its solid structure. The butter adds skin-softening richness. The oil provides the moisturizing base. You need all three, and the ratio is equal parts of each — 1/4 cup of everything makes a batch of 8–10 bars.
Beeswax pastilles create the solid structure of the bar and give it the texture you’re aiming for — firm enough to hold its shape, soft enough to melt on skin contact. Beeswax also forms a light protective barrier on skin that helps seal in moisture without feeling occlusive. Look for pastilles rather than a block — they melt faster and you don’t have to grate anything. A small bag goes a long way.
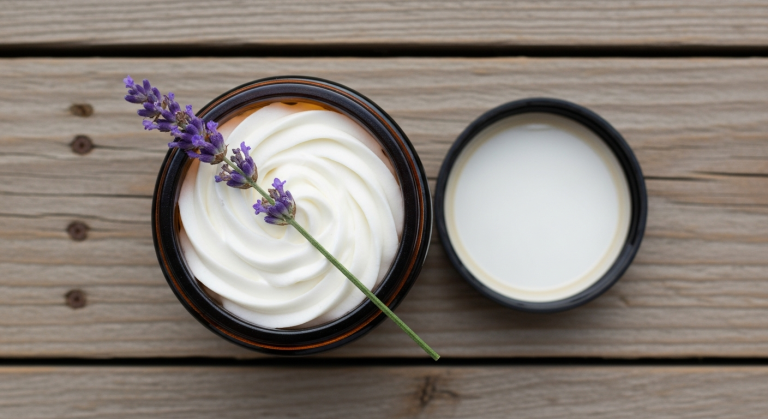
Shea butter or cocoa butter — choose one to start. Shea butter is lighter and absorbs a bit faster, which makes it a good all-purpose choice. Cocoa butter is richer and has a faint natural chocolate scent (it’s lovely). Shea is my default for most batches because it works for almost everyone; cocoa butter is my pick when I want something richer for cracked heels or a winter hand bar.
Carrier oil is the liquid base that carries the moisturizing benefits onto your skin and affects how the finished bar feels. Sweet almond oil is my default recommendation for beginners — it has a silky feel and absorbs without leaving a heavy residue. But there are a few good options depending on what you have or what you’re making the bar for. (More on that in the table below.)
Vegan option: No beeswax? Substitute candelilla wax at half the amount — 1/8 cup instead of 1/4 cup. It’s more potent, so the smaller amount gives you the same firmness. Avoid soy wax — it’s formulated for candles and won’t behave correctly in a skin product.
Which Carrier Oil Should You Use?
The carrier oil you choose is the main variable that affects how the finished bar feels on your skin. Heavier oils absorb more slowly and leave more of a rich feeling; lighter oils absorb faster and feel less greasy. Here’s a simplified breakdown:
| Carrier Oil | Feel | Best For |
|---|---|---|
| Sweet almond oil | Silky, medium absorption | Most skin types — my default for beginners |
| Sunflower oil | Light, fast-absorbing | Sensitive or irritated skin |
| Jojoba oil | Lightweight, non-greasy | Oily or combination skin |
| Olive oil | Rich, slow-absorbing | Very dry, cracked skin |
| Fractionated coconut oil | Very light | Reducing greasy feel — mix with another oil, don’t use alone |
Not sure which to choose? Use sweet almond oil. It works for almost everyone and produces a bar with a nice, non-greasy feel that most people like.
Which Bar for Which Problem?
If you have a specific skin concern in mind, this table will point you toward the right combination before you start:
| Skin concern | Best butter | Best oil |
|---|---|---|
| Dry hands | Shea | Sweet almond |
| Cracked heels or feet | Cocoa butter | Olive oil |
| Sensitive skin | Shea | Sunflower |
| After-sun soothing | Shea | Jojoba |
| Sore muscles (with essential oils) | Either | Sunflower + peppermint essential oil |
Equipment
You don’t need anything special for this. Here’s what you’ll use:
- Mason jar or Pyrex measuring cup — your DIY double boiler. Set it in a pot of simmering water and it melts everything gently without scorching.
- Small pot — just needs to hold a couple inches of water
- Silicone molds — round, square, or whatever you have. Standard muffin tins work too.
- Small metal tins or glass jars for storage or gifting — the 2-oz round tins are the classic choice and they’re easy to label
That’s the full equipment list.
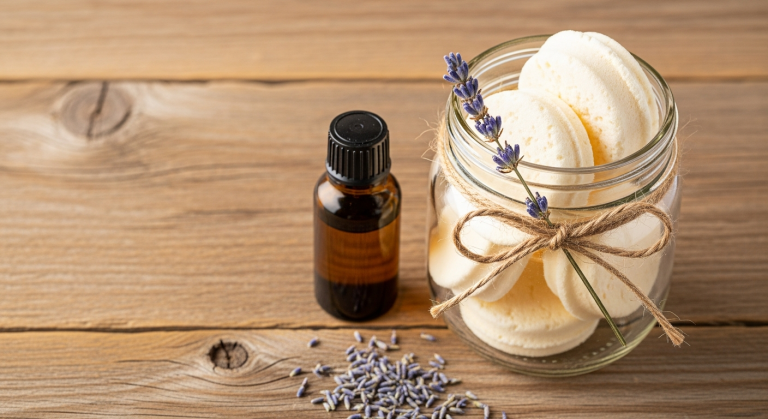
Basic Lotion Bar Recipe
This is the recipe I come back to every time. It’s equal parts of everything, which makes it easy to remember and easy to scale. No kitchen scale needed.
Ingredients:
- 1/4 cup beeswax pastilles
- 1/4 cup shea or cocoa butter
- 1/4 cup carrier oil (sweet almond recommended)
- Optional: 30–40 drops essential oil
Makes 8–10 bars
Steps:
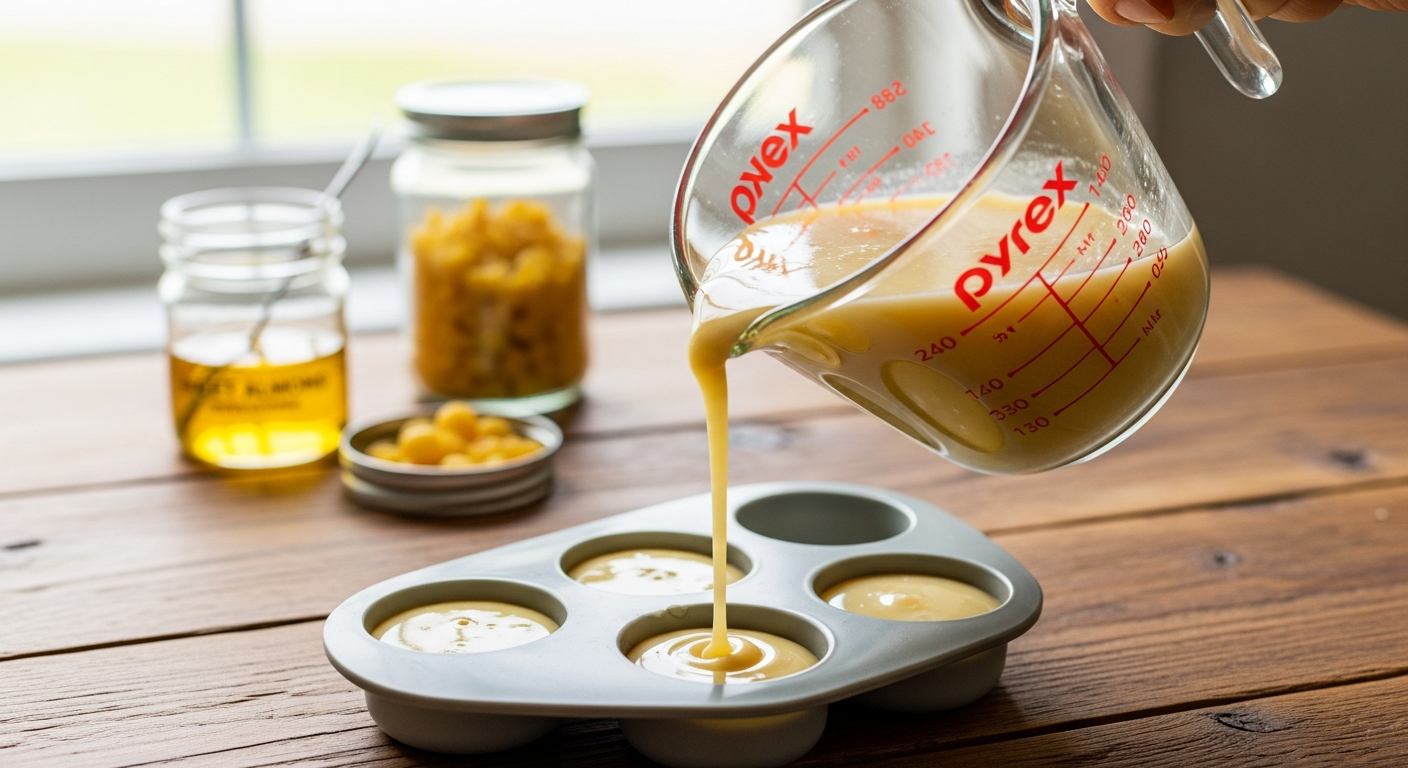
- Combine the beeswax, butter, and carrier oil in your mason jar or Pyrex measuring cup.
- Place the jar in a small pot with about 2 inches of simmering water. Stir occasionally as the ingredients melt together. Low and slow — don’t let the water boil aggressively.
- Once everything is fully melted and combined, remove from heat.
- Let it cool for 2–3 minutes before adding essential oils if you’re using them. High heat drives off scent — this short cooling step makes a real difference in how the fragrance holds.
- Consistency test: drop a small amount on a cold plate or the back of a cool spoon. After 30 seconds it should be soft and slightly glossy, not runny. If it’s still liquid, add ½ tsp more beeswax and remelt briefly. If it’s hard and waxy, add 1 Tbsp more carrier oil.
- Pour into molds carefully. Don’t cap or cover while they’re cooling — condensation will cause surface issues.
- Let cool completely at room temperature (1–2 hours) or speed it up with 20 minutes in the fridge. Pop out of molds and store in tins or jars.

The Consistency Test
The cold plate test is the most useful thing I can tell a beginner. It takes thirty seconds, and it tells you whether the bar will set up right before you commit to pouring into molds. A good lotion bar should be soft enough to glide across your skin without dragging, but firm enough to hold its shape at room temperature. If you pour too early and it’s too runny, don’t worry — everything in this recipe is reheatable and fixable. Nothing is ruined. The whole batch can be remelted, adjusted, and poured again.
Customizing Your Lotion Bar
The basic recipe is complete as-is — you don’t need to customize it to have a great product. But if you want to make it your own, here are two easy ways.
Essential Oil Ideas
Essential oils add scent and, depending on which you choose, some additional skin benefits. For a batch made from the 1/4 + 1/4 + 1/4 cup formula (about 6 fluid ounces total), start with 30–40 drops total. Add them after the mixture has cooled a few minutes off the heat.
A few beginner-friendly options:
- Lavender (30–40 drops): Calming, universally liked, and skin-soothing. This is the safest first choice — it works well with any butter and oil combination and most people love the scent.
- Peppermint (30–40 drops): Cooling and energizing. Especially good in a foot or heel bar — that cooling sensation on tired feet is genuinely satisfying.
- Sweet orange (30–40 drops): Bright and cheerful, safe for daytime use, and pairs beautifully with the natural scent of cocoa butter.
- White chocolate peppermint combo: Use cocoa butter as your butter AND add peppermint essential oil. The combination smells incredible and people always ask what it is.
Add essential oils after removing from heat and letting the mixture cool 2 minutes. High heat degrades both the scent and the beneficial properties of the oils.
Use a Herbal-Infused Oil (Next-Level Option)
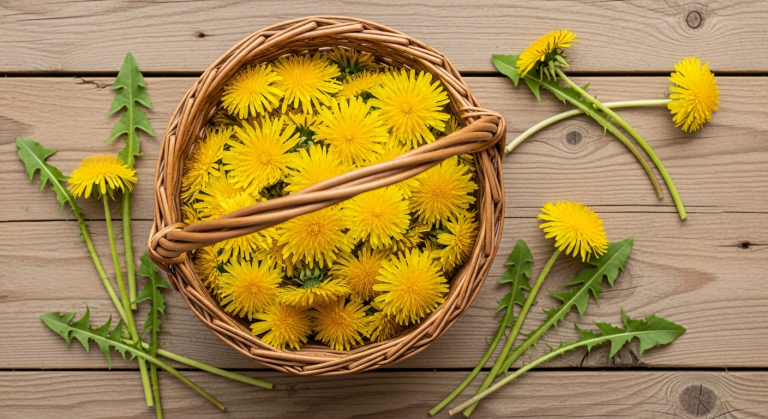
If you’ve already made a batch of herbal-infused oil — like the dandelion-infused olive oil from my dandelion salve recipe — you can use it here in place of the plain carrier oil. The infused oil carries the plant’s beneficial compounds directly into the bar. Calendula, dandelion, and lavender all work beautifully. If you haven’t made infused oil before, the basic recipe with plain carrier oil is perfect — no need to add another step to your first batch.
Lotion Bar Troubleshooting
Most lotion bar problems have simple fixes — and almost all of them involve remelting and adjusting. Nothing is permanently ruined. This is the section I wish I’d had when I was starting out.
My Bars Are Too Soft
Set them in the fridge for an hour to check if they firm up enough with cooling — sometimes a soft bar just needs more time. If they’re still too soft, remelt the batch over low heat and add ½ tsp more beeswax pastilles. Stir until fully melted, do the cold plate test, and pour again. Add beeswax in small increments rather than all at once — it’s easy to overshoot.
My Bars Are Too Hard or Waxy
Remelt the batch and add 1 tablespoon of carrier oil. Stir until combined and test by rubbing a small amount on your inner wrist — a good bar should glide easily without dragging or feeling stiff against the skin. Keep adding oil in 1-tablespoon increments until the texture feels right.
My Bars Feel Too Greasy
Two approaches, depending on where you are in the process. For this batch: remelt and stir in 1/4 teaspoon of arrowroot starch or cornstarch before pouring. Stir very thoroughly to avoid clumps in the finished bars. For future batches: switch to a faster-absorbing oil — jojoba and sunflower both leave a noticeably lighter feel than olive oil or standard coconut oil.
My Bars Are Melting at Room Temperature
All lotion bars soften in warmth — that’s the mechanism that makes them work. If they’re genuinely pooling at normal room temperature (around 70°F), remelt and add a bit more beeswax in small increments. Store finished bars in a cool spot, ideally in a small tin with a lid. Never leave them in a hot car.
How to Use a Lotion Bar
Using a lotion bar is simple, but the technique matters a little more than with regular lotion.
Rub the bar between your palms for a few seconds — body heat melts it just enough — then massage the oils into whatever area you’re treating. You can also rub the bar directly on dry elbows, heels, or knees if you prefer. Either method works.
No wetting required. You don’t wet a lotion bar before using it. Your skin’s warmth does all the work. If you use it right after a bath or shower while your skin is still slightly warm, you’ll get better absorption — warm skin absorbs oil-based products more readily.
Best for spot treating: elbows, cracked heels, cuticles, knees, and hands after washing dishes. I keep one by the kitchen sink for after dishwashing — one of the best uses I’ve found for them.
Let the skin absorb for a minute or two before putting on socks or gloves. A little goes a long way — you don’t need to over-apply.
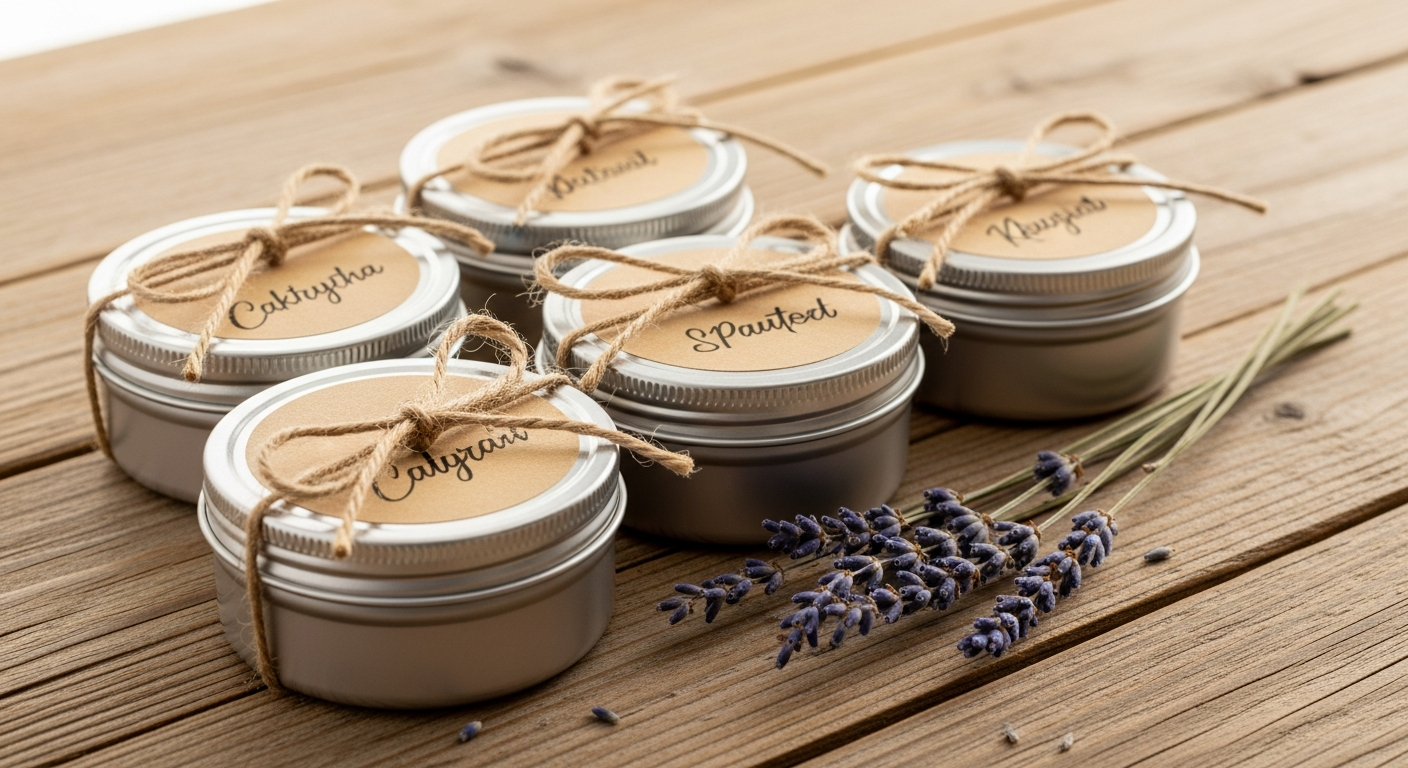
How to Package Lotion Bars for Gifting
A batch of lotion bars makes one of the better handmade gifts you can give — they’re useful, they smell good, and they look more put-together than they are to make. At $2–$3 per bar in materials, you can give them generously. Here’s how to package them well.
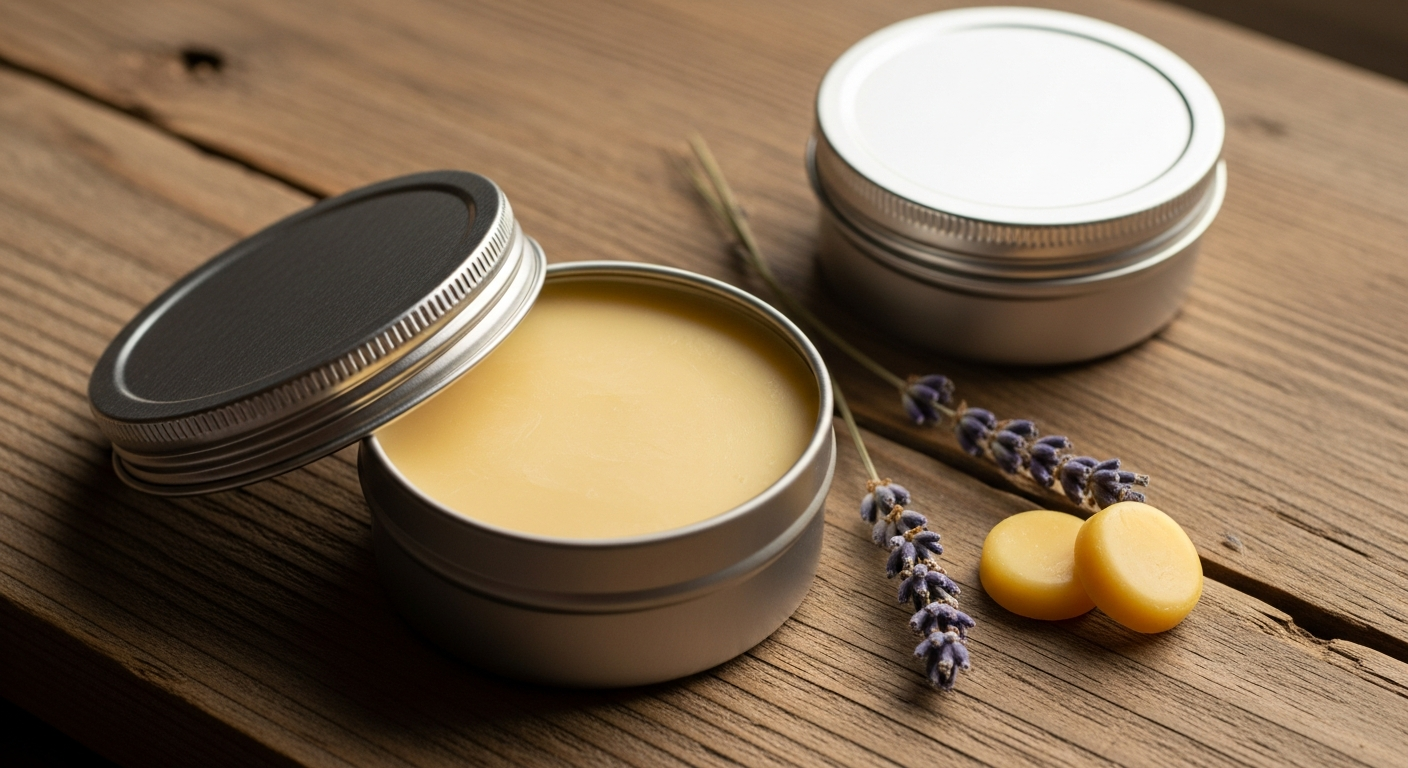
Pour directly into tins. Instead of using a mold and then storing the bars in separate containers, pour the melted mixture straight into small metal tins. The tin becomes the container. Let it cool with the lid off, then cap and label. This is the easiest presentation and the one I use most for gifts.
Use silicone molds for shaped bars. Heart shapes are classic for Valentine’s Day; round bars work year-round. Seasonal molds show up at big box stores like Target and Michaels — grab them when you see them. For a consistent year-round option, a simple round silicone mold makes bars that look clean and intentional.
Keep the labeling simple. A round kraft label with the scent name (or just “Lavender Lotion Bar”) and the date you made it is all you need to make these look finished and professional. Add a handwritten tag or a bit of twine for a little extra presentation.
These are well-suited for Mother’s Day, teacher appreciation gifts, Christmas stocking stuffers, and hostess gifts. The price point and the handmade quality hit the right combination for all of those occasions.
Shelf Life and Storage
Stored in a cool, dry spot away from direct heat and sunlight, a homemade lotion bar lasts 9–12 months — sometimes longer. Because there’s no water in the formula, there’s nothing to grow bacteria, which means no preservative is needed and the shelf life is genuinely long.
Label each batch with the date when you make it. “Made [date]” on the bottom of the tin takes five seconds and means you’ll never have to wonder how old a batch is. A good bar will smell like the oils and butters you used, possibly with the essential oil scent you added. A batch that’s gone off will smell noticeably rancid — like old cooking oil. That’s a clear sign to toss it and make a fresh batch.
To extend the shelf life further, stir ½ teaspoon of vitamin E oil into the melted batch before pouring. Vitamin E is a natural antioxidant that slows the oxidation of the carrier oils and butters — it’s not a preservative, but it does meaningfully extend how long the bars stay fresh. Store the finished bars in a cool spot; the fridge works if you have space, though bars stored cold will be firmer until they warm up.
Lotion Bar FAQ
What does a lotion bar do?
A lotion bar is a solid moisturizer that melts slightly against your skin’s warmth, leaving behind a layer of conditioning oils and butters. It softens dry skin, soothes rough patches, and helps protect cracked spots on hands, heels, and elbows. Because it contains no water, it doesn’t need preservatives and lasts up to a year at room temperature.
Do you wet a lotion bar before using it?
No. Use it on dry or slightly warm skin after a shower or handwashing — your body heat does the work of melting it just enough to apply. No wetting needed.
What is the difference between a lotion bar and body butter?
Body butter is typically a cream or semi-solid you scoop from a jar; it often contains water and requires a preservative to stay shelf-stable. A lotion bar contains no water, holds its shape at room temperature, and doesn’t need preservatives. Lotion bars also travel better — no leaking, no airport security issues — and last significantly longer than water-based moisturizers.
Can you make a lotion bar without beeswax?
Yes. Substitute candelilla wax at half the amount — 1/8 cup instead of 1/4 cup. It’s more potent than beeswax, so a smaller quantity gives you the same firmness. Avoid soy wax, which is formulated for candle-making and doesn’t behave correctly in a skin product.
How long does a homemade lotion bar last?
9 to 12 months at room temperature, sometimes longer. Adding ½ tsp of vitamin E oil to the batch before pouring extends the shelf life by slowing oil oxidation. Label each batch with the date so you always know how old it is.
Is a lotion bar good for your face?
Lotion bars can be used on the face, but I’d suggest starting with a small patch test on your inner wrist before applying more broadly. The oils and butters can clog pores for some people, especially those with acne-prone skin. If you want to try a facial bar, shea butter with jojoba oil is the lightest combination I know of. A thin layer on very dry patches — cheeks, chin — is usually fine, but everyone’s skin responds differently.